
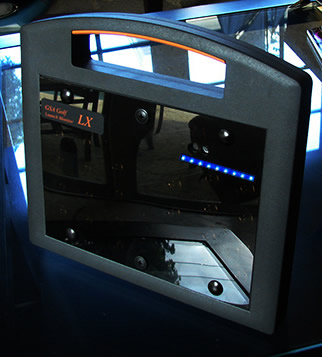
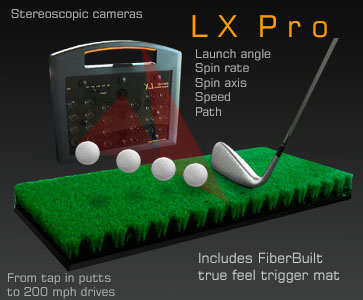
LX Pro Launch monitor
Operating & Installation instructions
Part 1
![]()

![]()
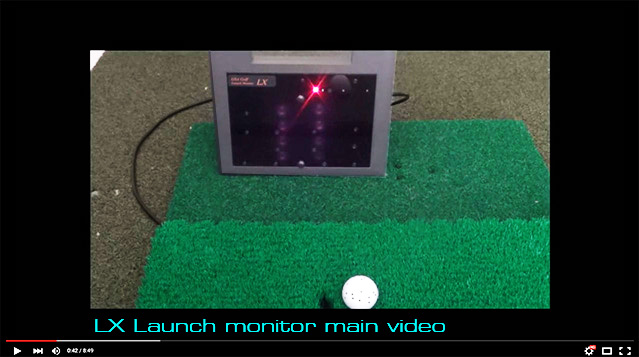
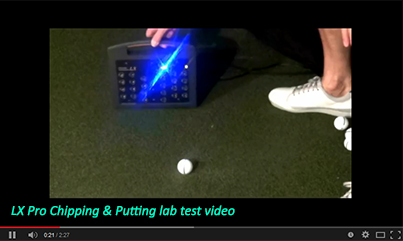
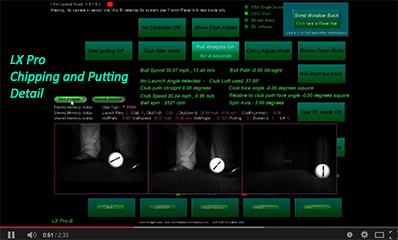
LX Pro lab test videos
 -
-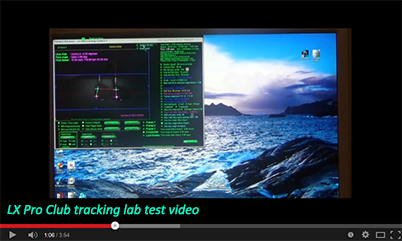
Here's a small sample of the LX Pro videos. Note: These are just lab test videos and not product promotional videos. Professional videos will be coming at the end of the year.
The above videos show the LX Pro Club Tracking and Chipping and Putting in more detail. Commentary coming on this video later.
 -
-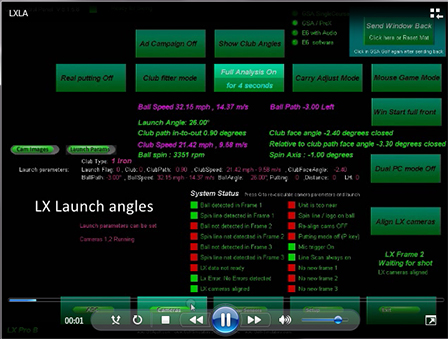
Click the above video links to learn about camera alignment and Launch Angle options
LX Setup
LX ball placement and setup positions
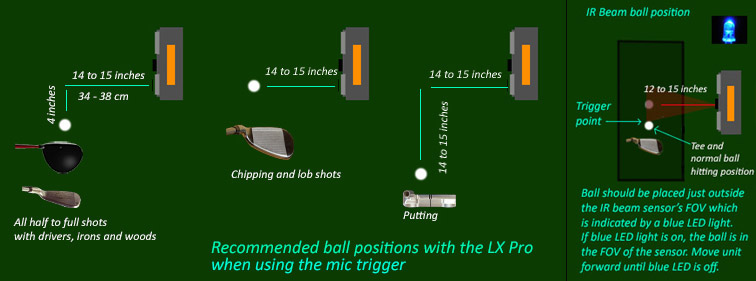
Recommended LX ball placements
 -
-
All new LX's now come with either a PX1 or PX2 club tracking / trigger mat.
The mat is connected to the LX unit via a RCA cable
![]()
Installation and user operation instructions
Like all GSA Golf's products, the GSA Control Panel must be running before game software is started.
After installing the software from the supplied DVDs, you should see a GSA Control Panel icon on your PC's desktop.
![]()
Double click on the GSA CP icon to start the Control Panel
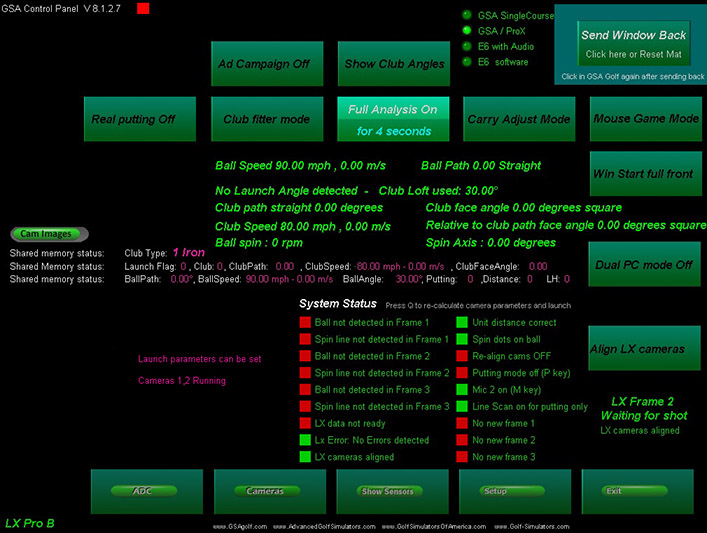
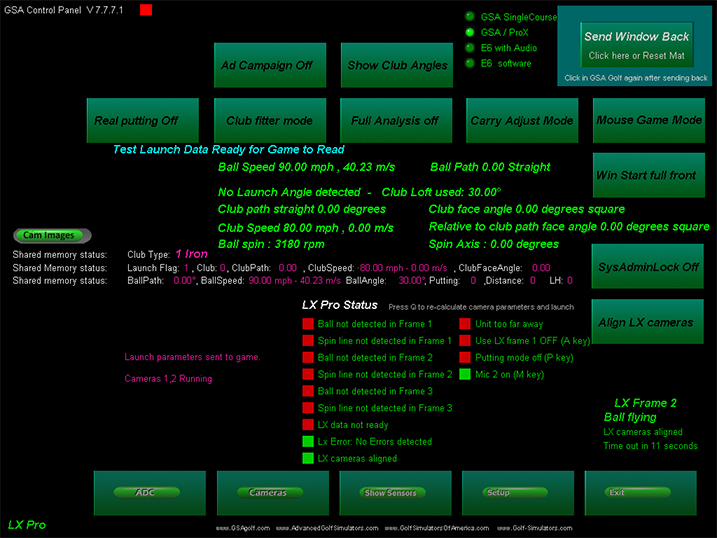
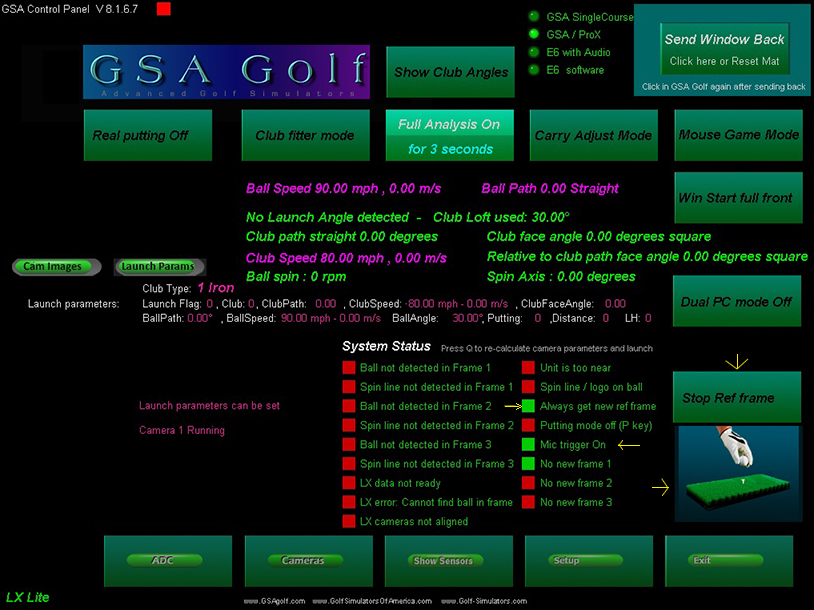
The main screen of the GSA Control Panel (also known as the CP) looks like the above image.
When the LX's cameras are connected to the PC you should see the
"Cameras 1, 2 running" text on the lower left side of the screen.
Go to the Setup window and check that the LX Pro B option has been selected at the top of the window.
Click on the Cameras button on the CP's main window to get the Cameras window of the CP.
The first job is to "right" mouse click on the "Defaults" button. This will set all camera settings to their default factory settings.
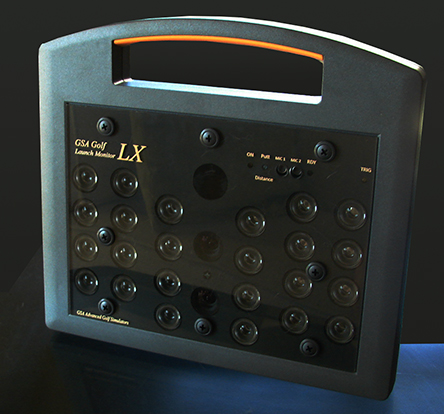
The LX Pro uses two cameras to capture 2 or 3 frames of the ball.
Camera 1 is used to capture frame 1 and frame 2 and camera 3 is used to capture frame 3.
The cameras are usually in an idle state and only grab images when they are triggered.
A trigger signal can come from any of the following sources:
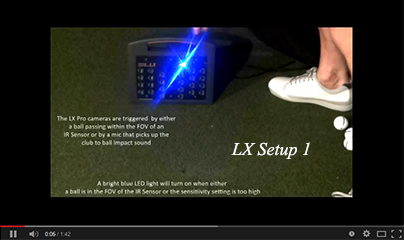
1. The built in microphone that picks up the impact sound of a club hitting a ball
2. An external optical sensor built into a hitting mat.
3. A software generated signal from the Control Panel
The cameras can also stream images by selecting the Video stream mode in the CP.
This is usually only used to focus the camera lenses though - which in the case of the LX, is already factory set.
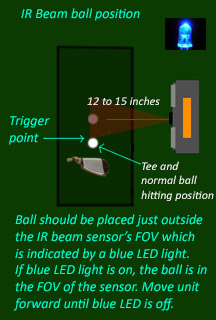
The unit should be placed so that the ball - just after impact - triggers the cameras an inch or two in front of the tee or normal hitting position.
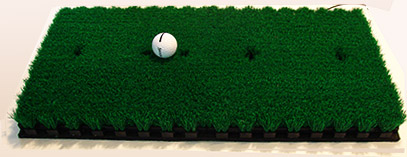
When using the Trigger mat, a bright blue LED will light up when the ball is over the IR beam. Place the ball just behind this point so the the blue LED light is off.
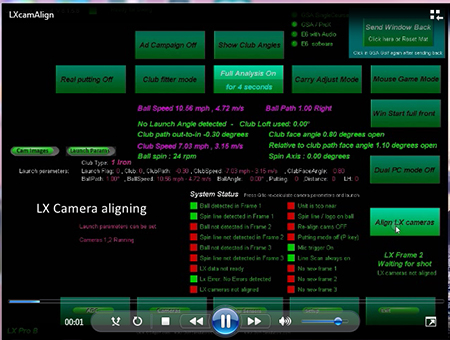
Aligning cameras - LX Pro only
The LX Pro features two cameras that need to be aligned at least one time after first setting up.
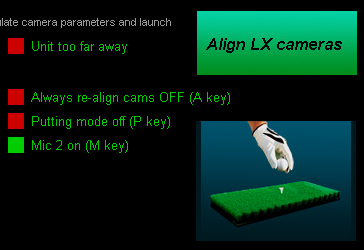
To align the cameras, place a ball on a tee in it's usual tee position in front of the LX Pro and click the Align LX Cameras button.
You should see an animation indicating the alignment process which takes about 3 seconds..
When complete, the system will switch to frame 2 and be in the "Waiting for shot" mode.
Camera alignments are stored so if after use the unit is not moved the alignment process does not have to be repeated.
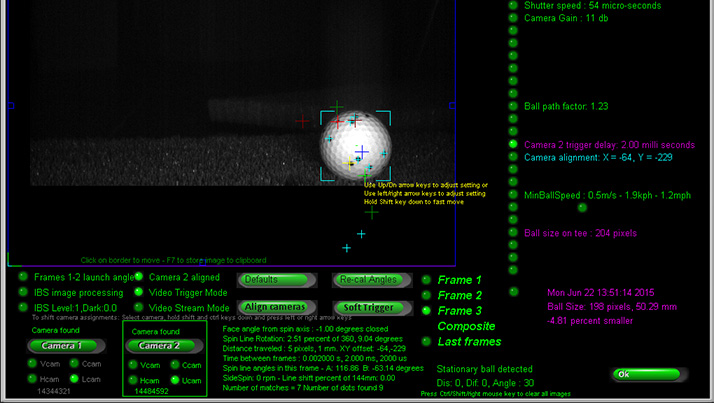
The unit should be placed so that the ball appears at the lower right-hand side of the screen in the Camera Window of the Control Panel.
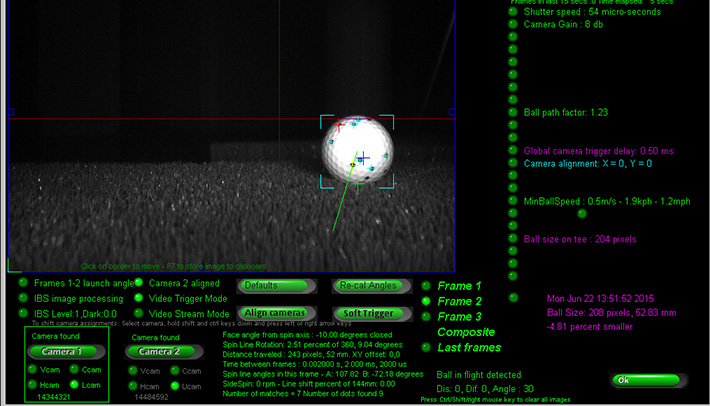
After placing the ball on the mat, click the "Soft Trigger" button to grab a new frame. Ensure that the ball image has been detected by the CP.
i.e. the ball images is not too bright and not too dark and all spin dots have been detected.
If too bright, then turn down the camera gain a bit, if too dark then increase the gain.
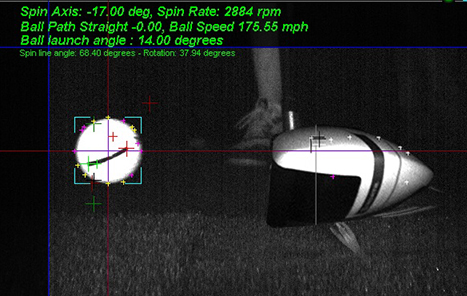
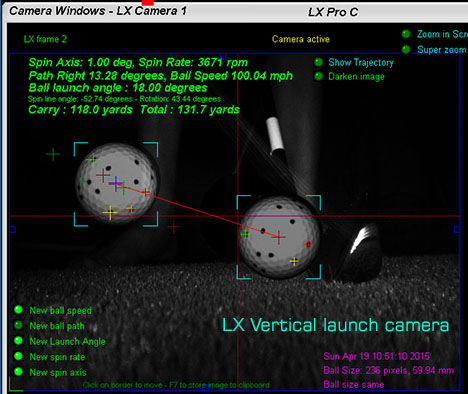
The above screen shot shows the ball as viewed by camera 1. Frames 1 and 2 are captured by camera 1.
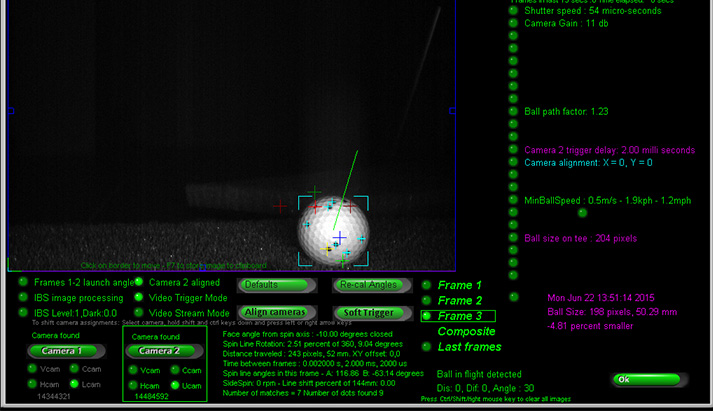
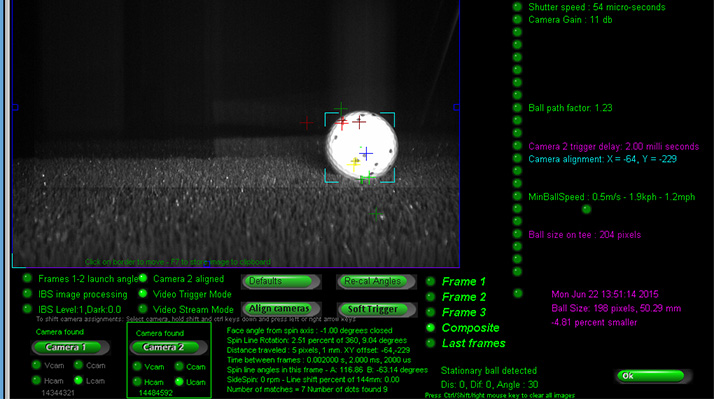
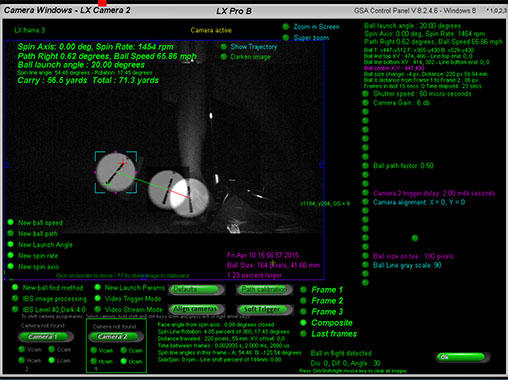
This is the same ball as viewed by camera 2. Note that with no camera alignment, it appears lower in the screen.
This is because camera 2 is mounted over camera 1 in the unit and is thus higher off the ground.
If the ball appears too low and is not completely visible, then adjust the rear 2 feet on the unit to tilt the unit further forward.
After clicking the "Align cameras" to set the alignment, the ball will appear at the same level as the ball in camera 1.
Note the "Camera alignment X, Y numbers" on the far right hand side of the screen.
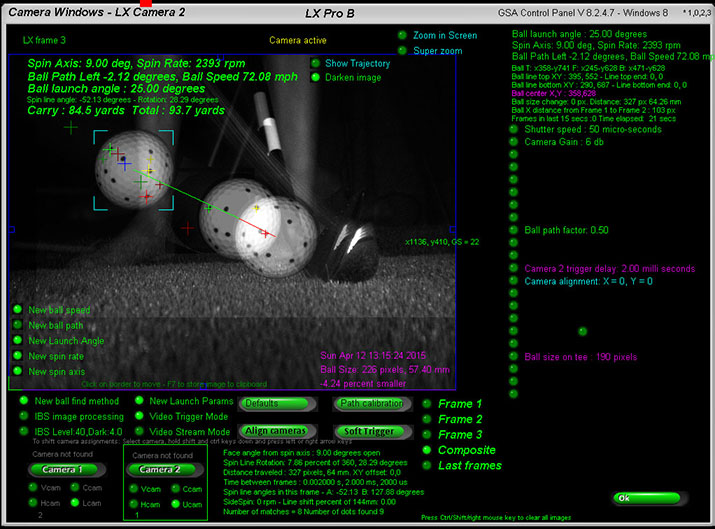
If you now select "Composite" frames, the ball images should directly overlap.
Please note that when using the trigger mat, you should mount the LX Unit on a base or plinth to bring the unit up to or near the height of the mat if the mat is not embedded into the flooring.
Basic camera system test
To make a basic camera test place a ball with the ball's line marking or logo facing the unit around 12 to 15 inches away from the unit in front of the right bank of IR LEDs .
Whenever a trigger signal is sensed you should see that the blue LED flashes.
If this blue LED is permanently on but no ball is on the mat then the sensitivity should be reduced.
Use the dial on the back of the unit to reduce the sensitivity until the blue led just goes off.
Now switch to Camera 2 in the CP. Frame 3 should then have been automatically selected.
Clicking the Soft Trigger button again should show an image similar to the above image.
Assuming that ball and spin line has been correctly detected, this then completes the basic camera system test.
Basic operation system test
The LX uses 3 camera frames - 1,2 and 3 - whereby frame 1 is only used to align the two cameras.
All calculations are done between frames 2 and 3 of the ball in flight.
The CP main window should look similar to the above and be in "Waiting for Shot" mode when first started.
Even though the game golf course software is not yet running, you are now ready to take a shot to test the shot detection of the LX.
So now go ahead a strike the ball.
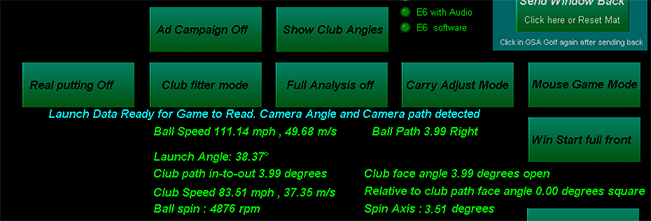
If all is running correctly you should see in the CP's main window that the ball's launch angle, speed, path,
spin and spin axis has been detected and the launch data is ready for the game software to read.
If we had game software running (i.e. ProX, GSA Golf or E6) then this data would be calculated
into a ball trajectory and the ball would launch in the game.
After taking a shot you can view each individual frame in the CP by selecting frame 1,2 or 3.
Switch to composite frames to view all 3 frames together.
Running the game software
Okay, so now we are ready to play.
First click the "Send Window Back" button in the top right hand corner of the CP to iconize the CP so that it's out of the main view.
Now start the game software that you have ordered.
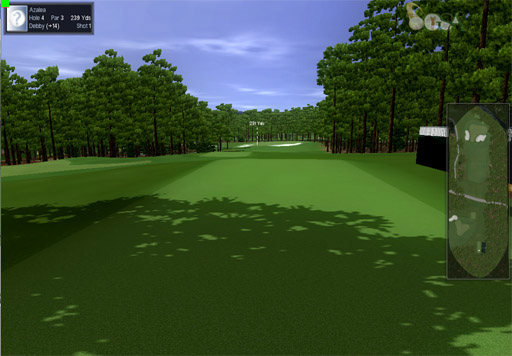
You are now ready to tee off
![]()
White clubheads with the Mic unit placement - no problem.
The LX image processing software has no problem with white club-head drivers.
LX Ball Markings
Regular balls with either a black logo or line can be used with the LX
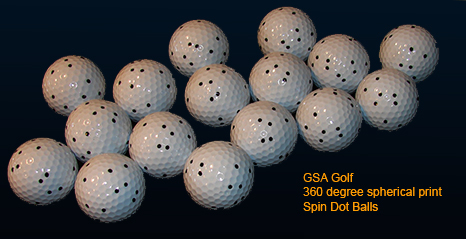
However, all LX's are supplied with special spin dot pattern balls that save the player
from having to bend down and line up the ball logo or line to the cameras.
LX P2

The LX-P2 combines the LX-Pro ball tracking with the PX2 club tracking
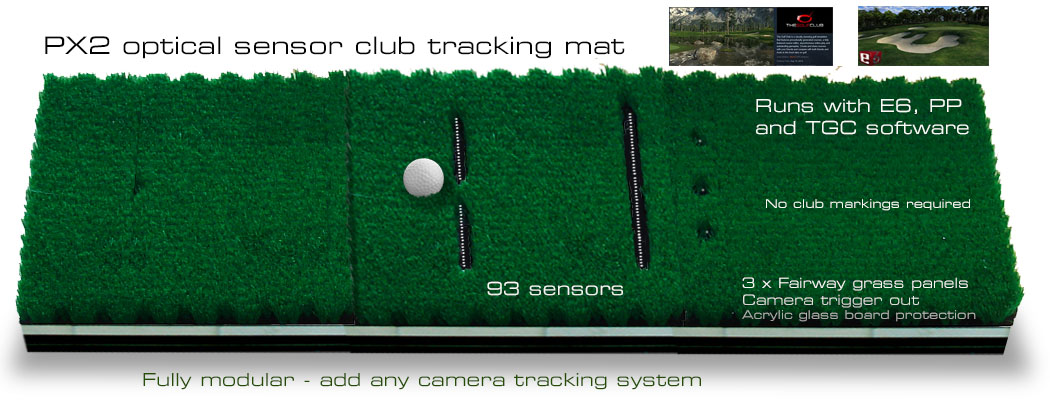
Click the above image to read about the PX2 setup

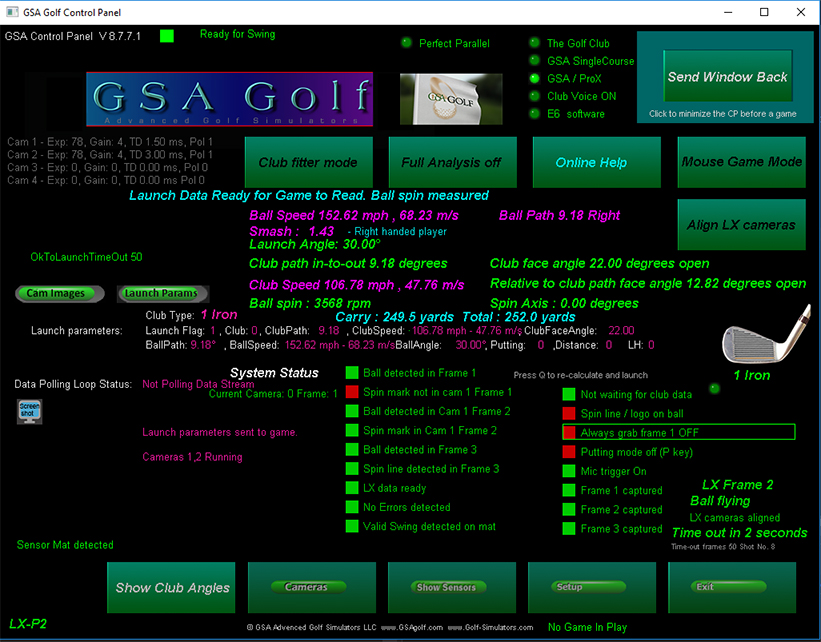
The above shows the Control Panel's main window after a shot with the LX-P2
It shows a "Valid Swing detected on Mat"
Balls were detected in all 3 frames.
Spin lines where detected in frames 2 and 3
All 3 frames were captured.
LX-P2 trouble shooting
If - after a shot - you see that a number of the main status boxes don't turn green from red, check the following:
1. Red box on Valid Swing not detected mat
Go to Testing the GSA PX2 Sensor mat
2. One or more of the "Frame captured" boxes are red
The camera trigger signal comes from a sensor in front of the ball tee position.
In order for the trigger sensor to function, light from the overhead mounted halogen light must be getting down onto the sensor
and the ball must cast a shadow over the sensor as it passes over it after a shot.
Check by passing a club over the trigger sensor to see that it triggers the cameras.
You should see that the IR LED lights in the LX flash when doing this
and that new images are captured in the LX frame windows of the Control Panel.
3. One or more of the "Ball detected" boxes are red
Check in the LX frame windows of the Control Panel that the ball is visible in all frames from 1 to 3
If visible, check to see that the ball is bright and that the aqua colored corner frames are around the ball as in the above image.
If the ball appears dark then increase the camera "Gain" and soft trigger to capture a new frame to see if this helps.
If the ball appears too bright and the markings on the ball are not visible then decrease the camera "Gain" and
soft trigger to capture a new frame to see if this helps.
4. One or more of the "Spin lines not detected" boxes are red
Check in the LX frame windows of the Control Panel that the ball's markings are visible in all frames from 1 to 3
If the ball appears too bright and the markings on the ball are not visible then decrease the camera "Gain" and
soft trigger to capture a new frame to see if this helps.
Ensure that when placing the ball on the mat that the markings on the ball (dots or logo) are facing the LX.
5. Ensure that the mic trigger is switched off on the LX when using the PX2 mat.
6. Ensure that the RCA trigger cable from the PX2 mat is plugged into the LX
7. Send screen shots of the LX frame windows after a shot to us for analysis if the fault cannot be corrected.
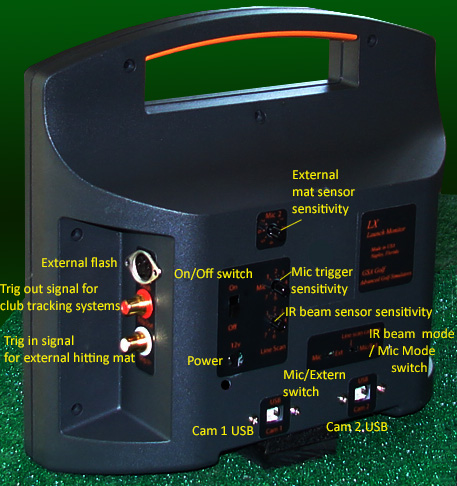
LX Trigger Modes
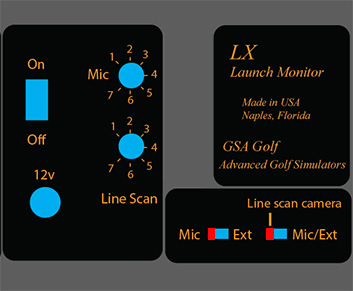
The LX Pro has 2 camera trigger modes:
1. Microphone - which detects impact sound of club striking a ball
2. External trigger - an optical sensor embedded in a hitting mat
LX Trigger sensitivity levels
Microphones
Use the mic dial on the back of the unit to set the mic's sensitivity.
Set so that it detects a solid hand clap but not so sensitive that it picks up voices or softer hand claps.
Select IR Beam mode or mic mode with the small slider switch on the rear of the LX to the left.
LX Control Panel settings
LX Pro Status list
The Control Panel for the LX Pro has a new real time Status list. After each shot, all boxes should turn green and the "Launch Data Ready for Game to Read" message should be displayed.
If spin lines where detected in frames then the "Ball spin measured" message will be displayed. Otherwise the "Ball spin calculated" will be displayed.
When you take a shot, all LX Pro Status boxes should turn green except frame 1 indicators which can be ignored.
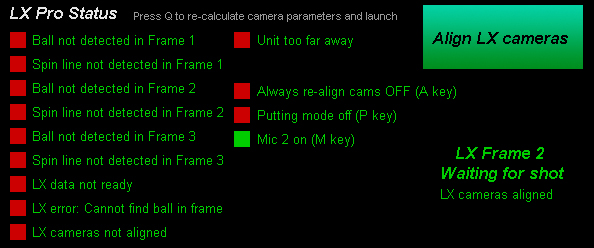
When the LX Pro is first switched on, the control panel LX Pro Status should like the above image. Ensure that "Mic2" is on and "Always re-align cams" is set to OFF.

Click above button to go to LX Installation Part 2
Optional true feel grass LX trigger mat
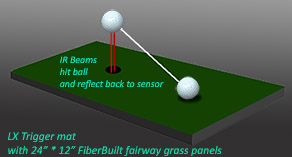

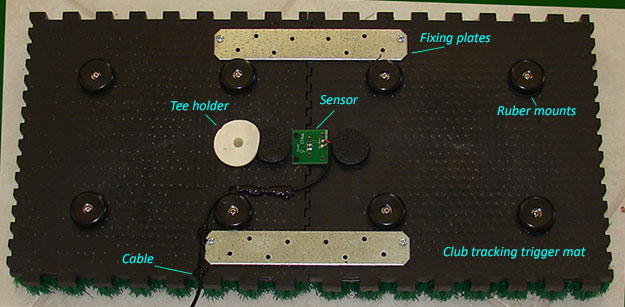
The LX Trigger mat uses an IR Reflex sensor system and so does not require an overhead lamp.
The sensor system consists of two IR emitter LEDs and a IR receiver sensor
Please note that when using the trigger mat, you should mount the LX Unit on a base or plinth to bring the unit up to or near the height of the mat if the mat is not embedded into the flooring.
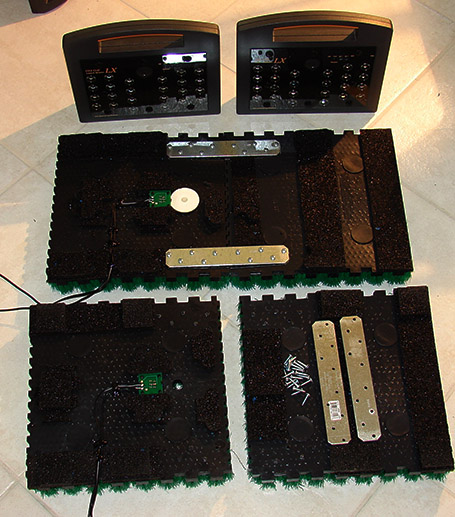
Note that the two FiberBuilt fairway grass panels of the trigger mat supplied with the LX Pro are shipped in two separate pieces.
The holes for the fixing plates are pre-drilled so all that has to be done is to fit the panels together and screw in the fixing plates.
A power drill with an appropriate Philips screw bit makes light work of this.
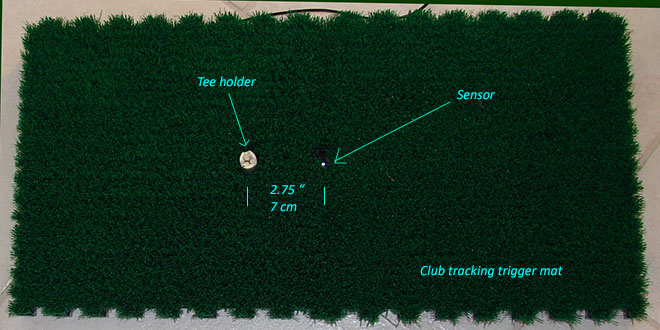
The sensor is installed into a mat around 2.75 inches or 7 cm behind the tee or normal hitting position
The sensor itself is supplied with the LX so that you can install it it your own hitting mat or you can purchase the ready made trigger mat from us for $299.

The LX Lite will always require a reference frame prior to a shot so that the system knows where the ball was on the tee or hitting position and at what position the ball spin line, logos or other markings were.
The process of acquiring a reference frame is - however - automated.
Before and after a shot, the LX Lite will constantly grab new images and look for the ball on the hitting position on the mat. During this process a small animation is shown in the Control Panel and the LEDs in the LX Lite will flash.
When a ball has been detected - usually after a second or so - the flashing will stop and a green LED light will turn on. Only when the green LED light is on should the use take a shot.
LX Lite vs LX Pro Click here to see LX Lite vs LX Pro
Click above button to go to LX Installation Part 2
![]()

![]()
![]()
 Home
Home Products
 Cameras
 Software
 Enclosures
 GSA Courses
 E6 Courses
 Business
 Tech News
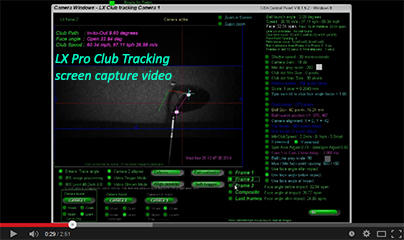
 -
-