![]()

VisTrak Eagle Installation
Installation Steps
Step 1.
Download and install the Control Panel software
Important:
Download and Run the latest CP update after installing the full version from the tech news page
Step 2.
nstall the camera driver software from the supplied USB drive

Click the above button for detailed camera installation instructions
Step 3.
Connect cameras to USB3 ports on your PC
Step 4.
Start the Control Panel and ensure that both cameras are running
(i.e. there's no error messages and you see the message that 2 cameras are running)
Step 5.
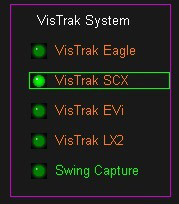
Go to the Setup panel and select Vistrak Eagle
from the list of systems on the right hand side of the screen
Step 6.
Go to the camera 1 panel and right click on the "Defaults" button to set all settings to their default values.
Step 7.
With a ball placed on its normal launch position on your mat,
select the "Show Full Ball Frame" option and the "Video Stream Mode" option and aim the camera so that it appears close to the center of the screen
Step 8.
Click on the Start Cameras button in the Control Panel's main window and wait a second or 2 until you see the message " ball detected, ready for swing"
You are now ready to play the ball
Step 9.
after a ball strike, you should see the message "Ball launch detected. Launch parameters sent to the game software"
Step 10.
Start you golf game software (E6, GSpro, TGC, CG3d or GSA Golf) and click the large minimize button at the top right of the screen .
You are now ready to play a round.


![]()
VisTrak camera setup videos
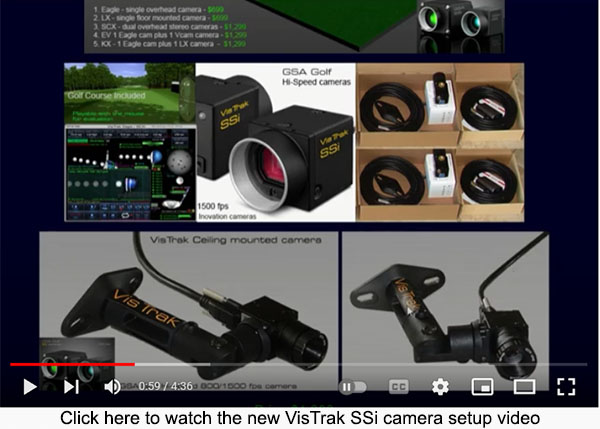
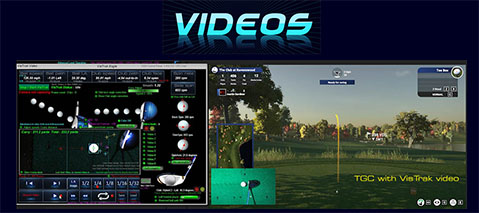
Click above image to view all VisTrak setup YouTube videos
![]()
Fault finding and Issues
![]()
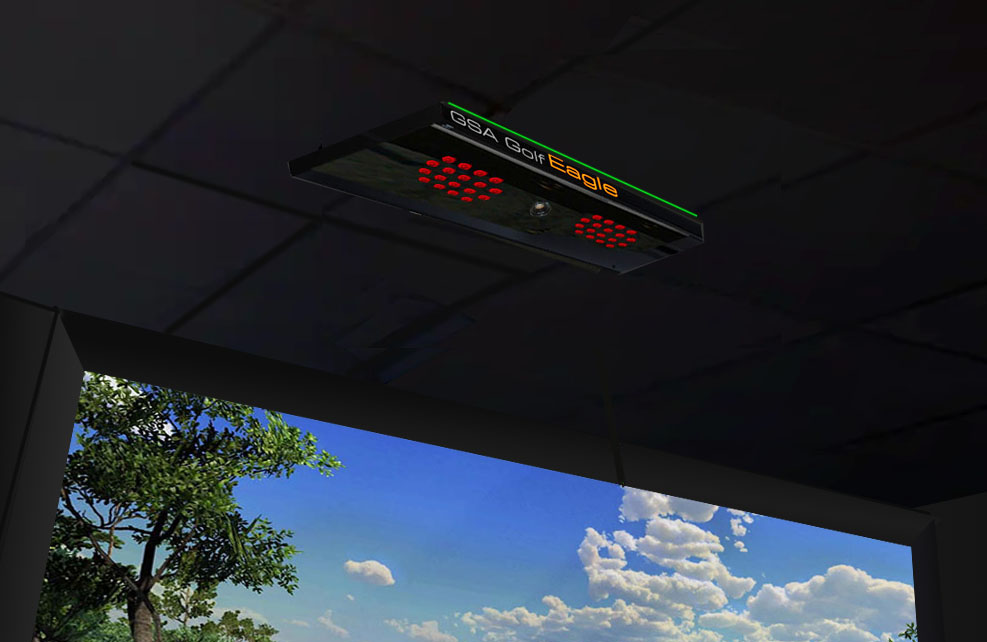
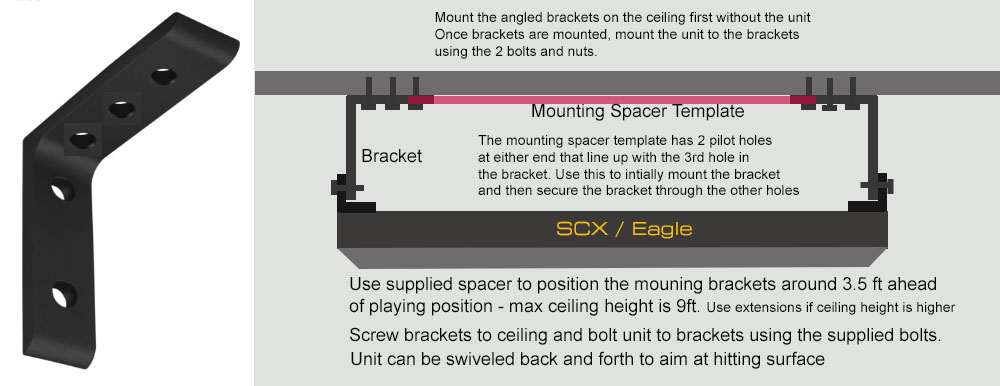
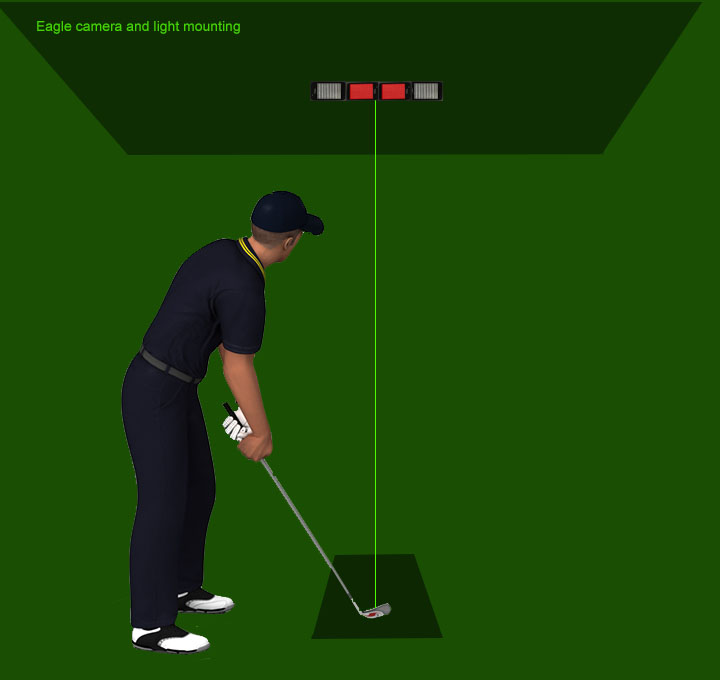
Mounting the Cameras
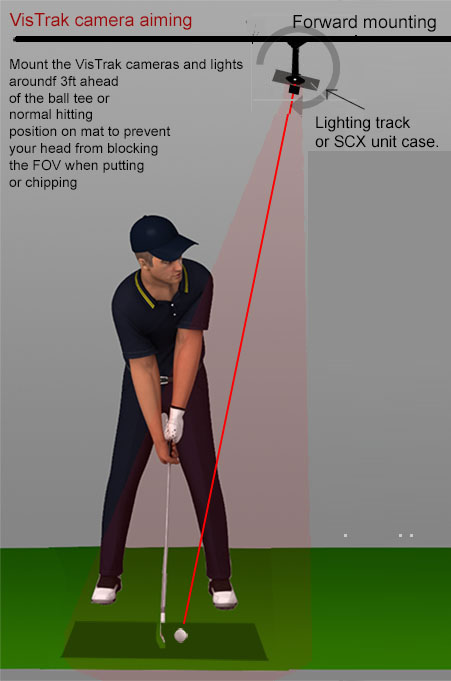
Mounting height should be around 8 to 9 ft
Tilt unit down so that it points back to the ball hitting area
![]()
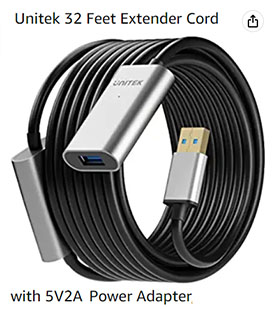
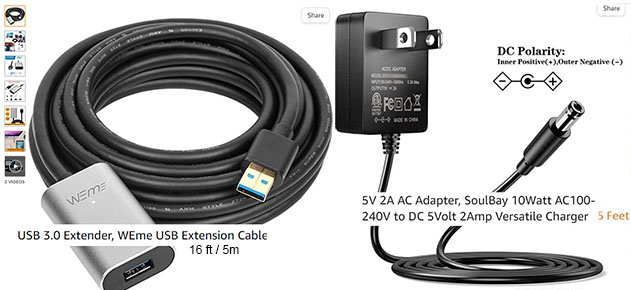
VisTrak Eagle wiring
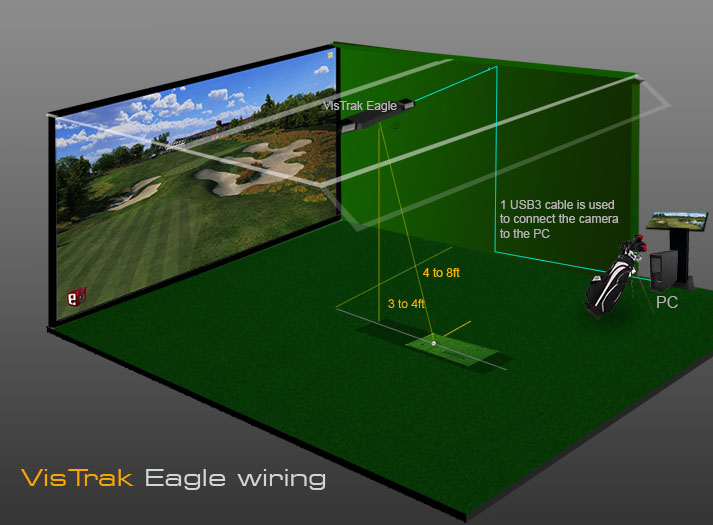
Run the USB3 cable as shown in the above diagram to the PC
Note: Max length of USB3 cables with extension is 25 to 30 feet with non-powered USB extension cables.
Max length of USB3 cables with extension is 40 feet with powered USB extension cables.
GSA Golf system minimum PC requirements
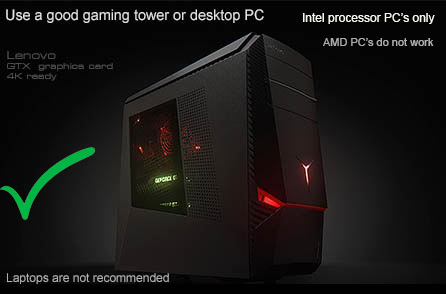
Intel i5 or above Processor
Warning! Do not use PC's with AMD processors!
8GB RAM Nvidia 1070 Graphics Card or equivalent
25GB of Hard Drive Space
Windows 10 or 11 (Required)
Internet Connection
(Required if using 3rd party game software such as E6, TGC or GSPro)
USB3 port (Required)
Note: The cameras are USB3 cameras
and will only run at the correct speed when connected via USB3 cables directly to separate USB3 ports on the PC
Warning
If using 2 cameras, do not connect the cameras together with a Hub !
All cameras must be directly connected to separate USB3 ports on the PC
Use only powered USB3 extension cables if the supplied cables are not long enough
![]()

Click above button to read
![]()
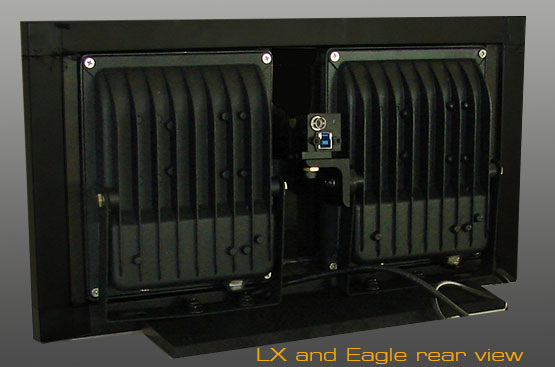
Main power is 110v/240v
The Eagle can be supplied with two additional IR LED lights.
The lights can be mounted anywhere near the VisTrak Eagle unit but usually left and right of the main unit.
The lights come with 12v power adpaters that require 115/240v supply.
Aim the lights at the hitting position on the mat
![]()
Installing the Control Panel software
Follow the download links sent to you via email
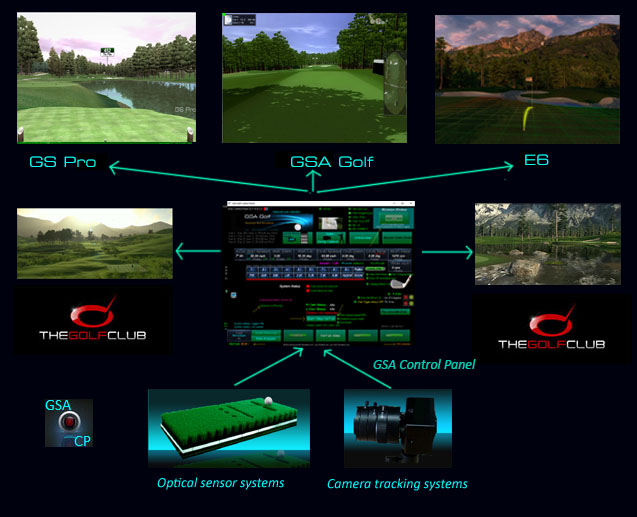
The GSA Golf Control Panel (CP) interfaces the cameras to the game software
and performs all the camera image processing to calculate the shot data
Error message when first starting the CP ?
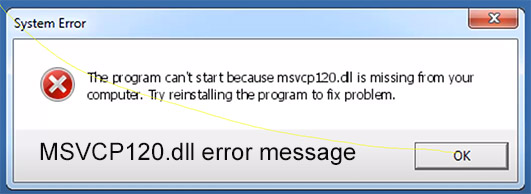
If you see the above error message when first starting the Control Panel (CP)
then your PC requires the VC Redistributable files.
Click on the above image to see an installation video
Download VC redistributables hereHere
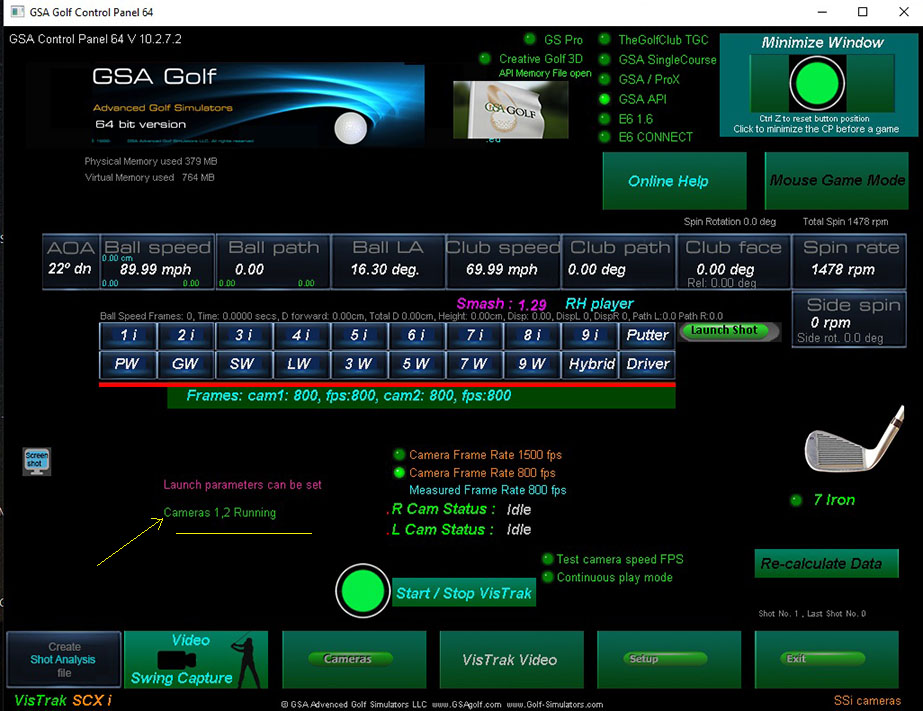
The CP main window
Depending on what system you have, you should see either 1 or 2 cameras are running
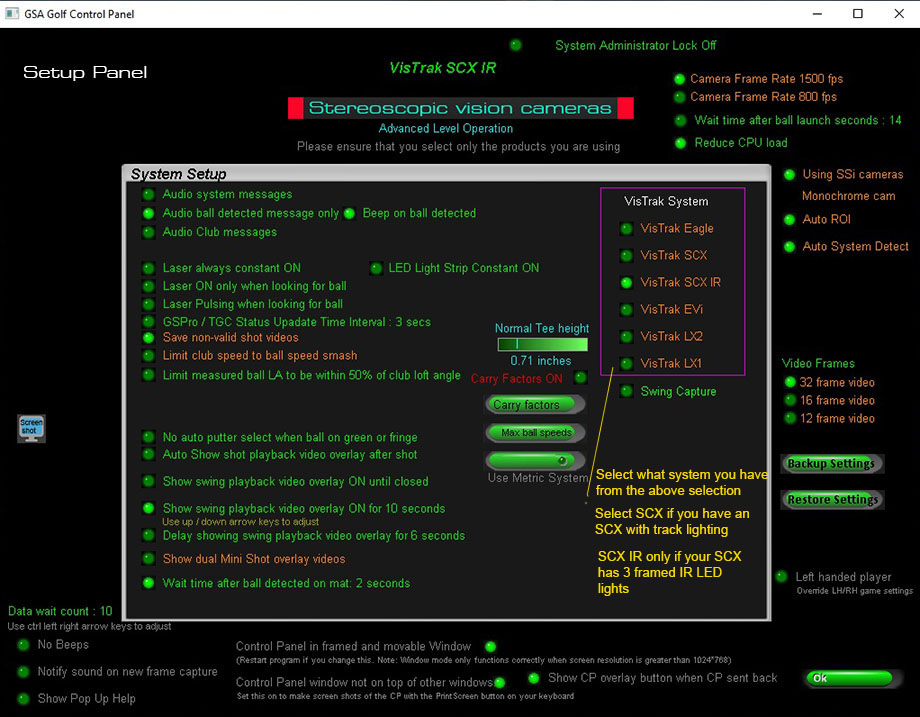
The CP setup window
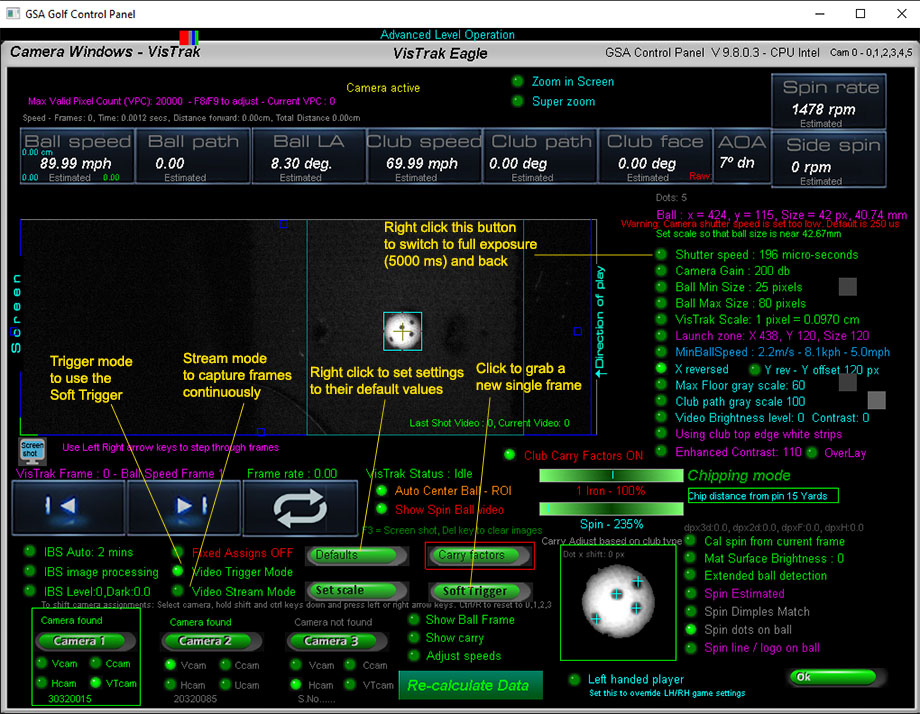
The CP Camera window
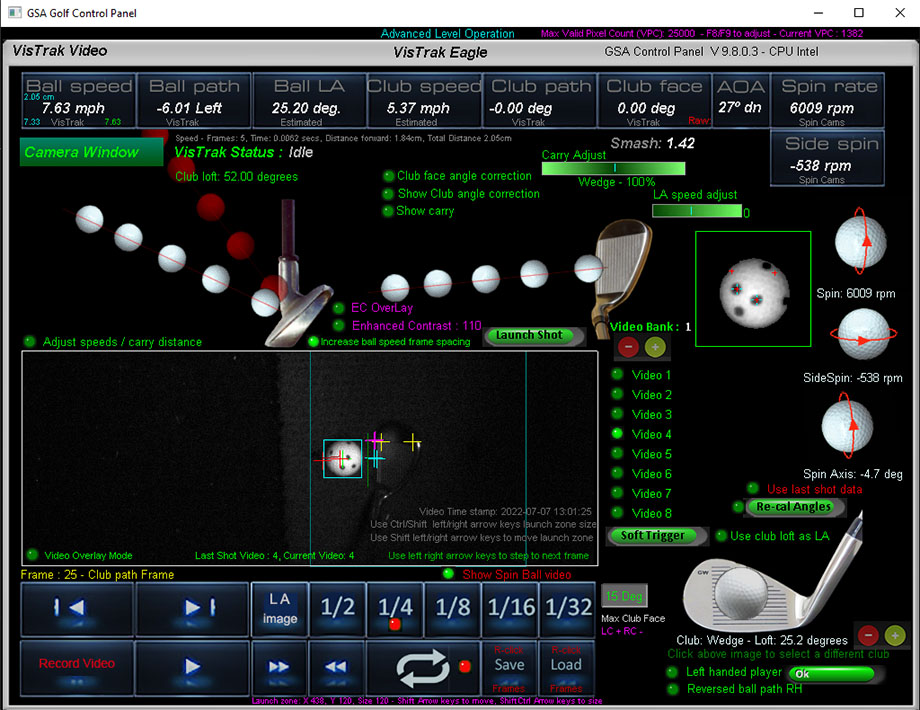
The CP Shot Video window
![]()
Lens focusing and aiming
It's important that the camera lenses are in focus.
The lenses are pre-focused before shipping though.
To focus, place a ball on the center line of the enclosure and point the camera at the ball.
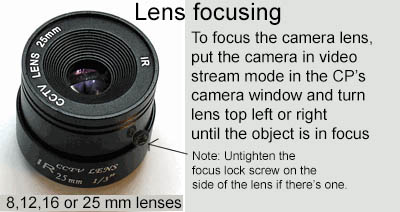
Switch to "Video Steam Mode" in the CP's camera window so that you see the captured images.
Rotate the outer dial on the lens in or out until you see that the ball is in focus.
![]()
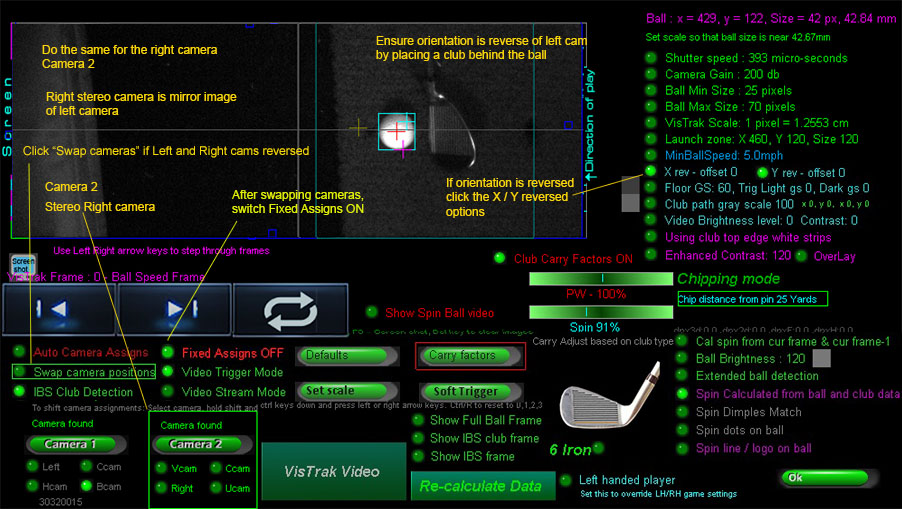
Aiming the Camera and Lights
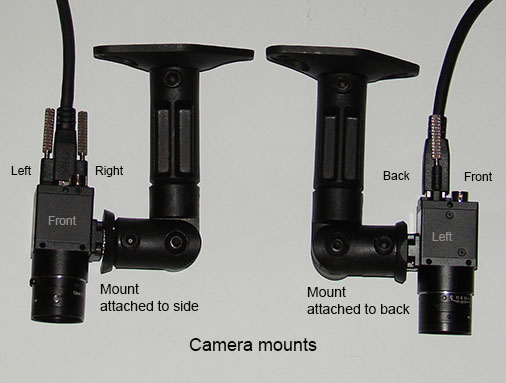
Depending on which side of the camera the mount is attached,
cameras may have to be rotated in order to obtain the correct orientation
If using the Eagle Panel version, tilt the panel down on its mount so that it points back to the hitting position on the mat.
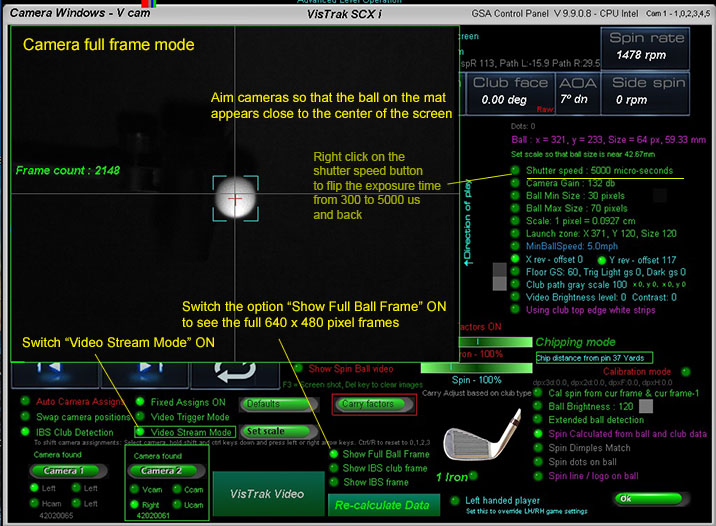
When aiming cameras, switch the options "Show Full Ball Frame" and "Video Stream mode" ON
If using just the camera with separate IR Lights, aim all lights and cameras so that they all point to the hitting position on the mat.

VisTrak Dynamic ROI (Region of Interest)
The Dynamic ROI feature allows the user to place the ball in a 2ft wide area on the hitting surface
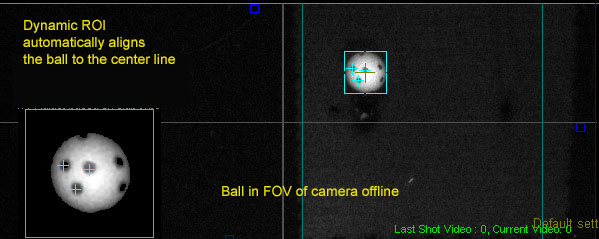
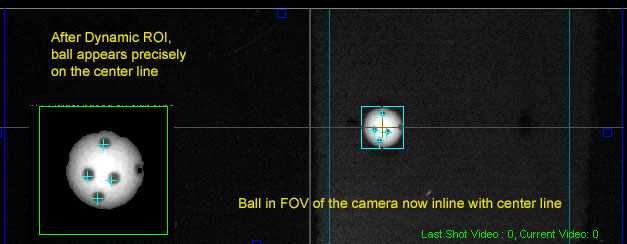
As such, aiming the cameras does not have to be exact as the CP software will always align the ball precisely to the center line
Improving Ball detection using camera "Contrast" settings
New camera image and brightness controls that turn low light dull images of the ball and club into vibrant bright images.
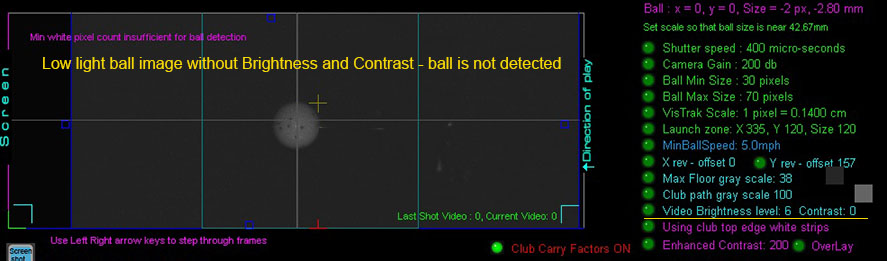
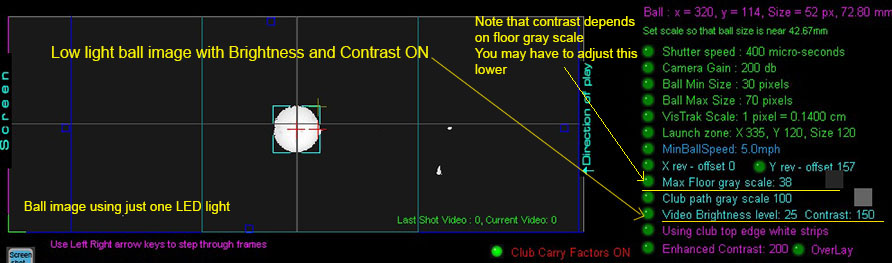
Click above images to read more about improving camera ball detection and Contrast settings
![]()
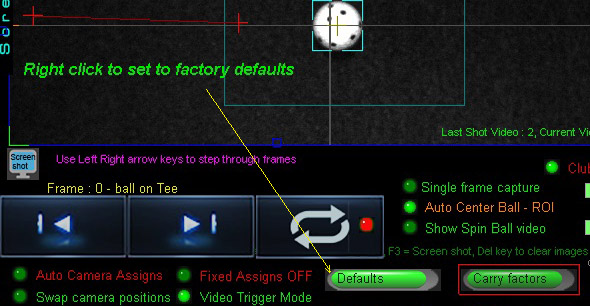
Ball speed factors
Please note:
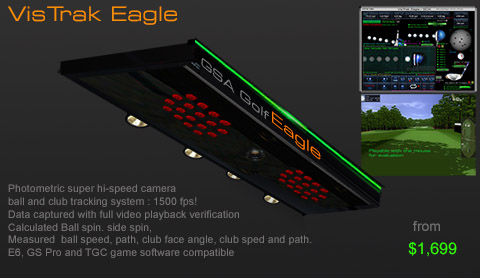
The VisTrak Eagle is a single camera system
and thus cannot detect vertical launch angle of the ball.
Vertical Launch Angle (VLA) is estimated from the loft of the club being used.
For this purpose, club dependent ball speed factors are used to help correct inaccurate ball speeds
caused by the actual ball VLA not being the same as the club loft.

If striking the ball on the down swing, then the VLA based on the selected club loft will be too high
and thus the measured ball speed and resulting carry will be too high and too long.
Set the Speed factor to match your ball striking swing. i.e. on the down swing or square .
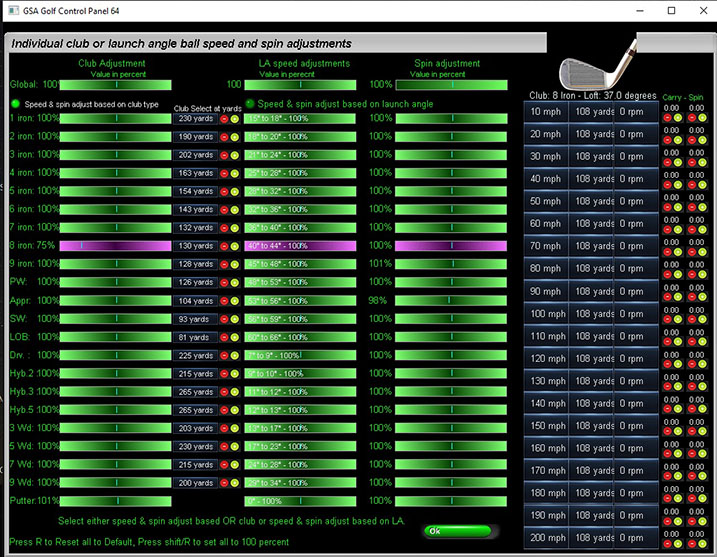
This Carry factors panel shows the speed factors for all clubsl
![]()
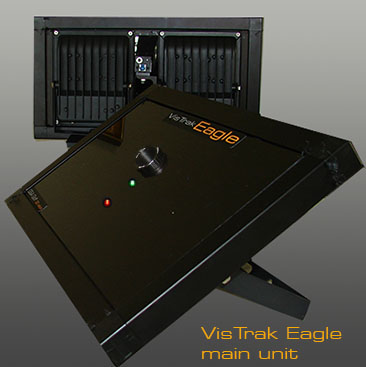
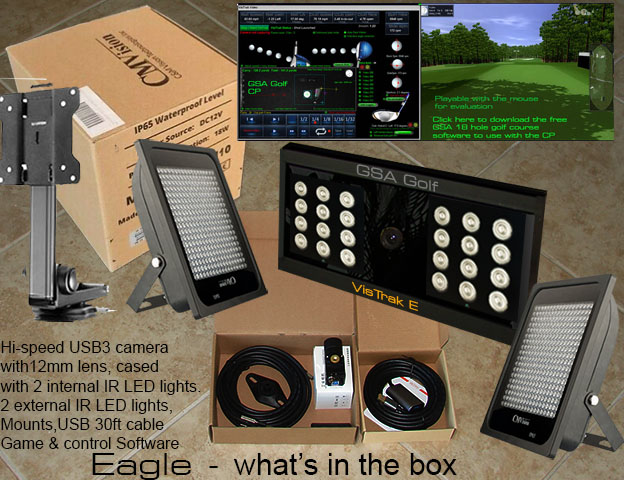
VisTrak Eagle - What's in the box
![]()
VisTrak Golf Game Play
VisTrak interfaces with TGC (The Golf Club), GSA ProX, GS Pro, RedChain, E6 1.6 and E6 Connect golf game software.
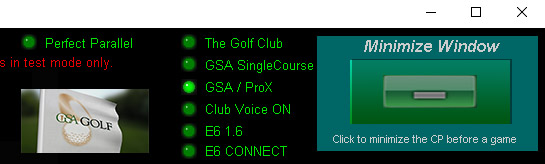
Select the game software you are using from the radio buttons at top right corner of the Control Panel's main window.
Click the large "Minimize Window" button to start the cameras and connect to the game.

After Clicking the large "Minimize Window" button in the CP,
2 small buttons will show at the top left hand side of the game software.
Click Control Panel to go back the CP
Click Show Swing Video to see the last shot video
![]()
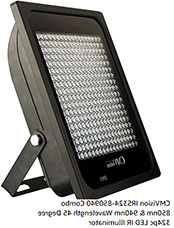
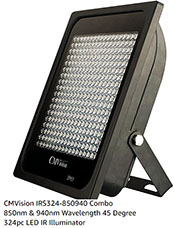
VisTrak Eagle Lighting
If you have purchase just the camera, the following IR lighting is required.
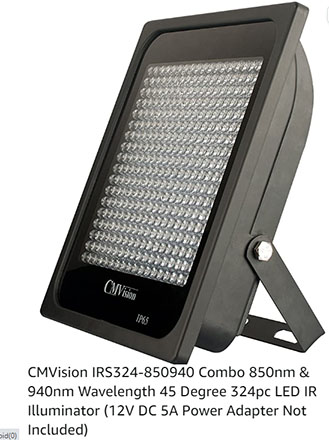
3 x CM Vision IRS324 850 nm IR Illuminators
Available on Amazon for $79 + $20 for 5 amp CM Vision power supply
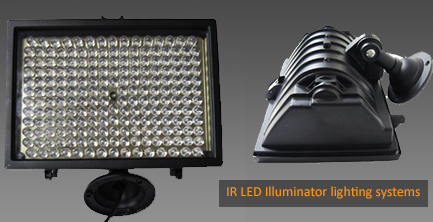
Alternatively 3 x CM Vision IR 200 - 850nm IR Illuminators
Available on Amazon for $69 with 3 amp CM Vision power supply
Note: these illuminators are - at the time of this writing - currently sold out on Amazon but are still available at CMvisionSecurity .com.
LED Track Lighting
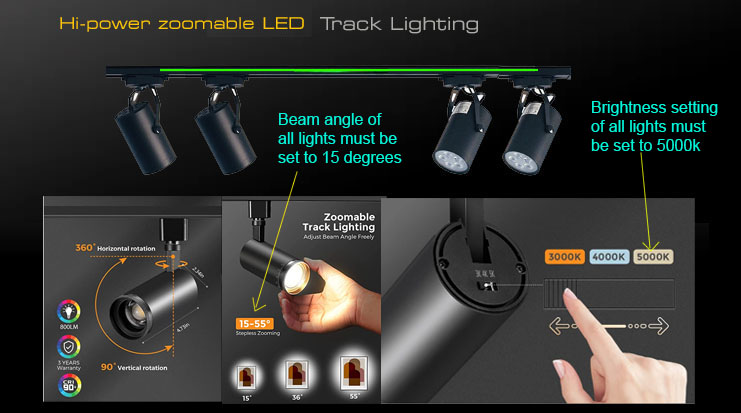
If purchasing your own cameras, a 2ft track with 4 LED spot are available on Amazon for around $130

4 hi-power LED zoom-able track light system with 800 Lumens per light with track
Price $199
![]()
Eagle Ball Spin
If you prefer measured ball spin instead of calculated ball spin, then spin dot balls will be required
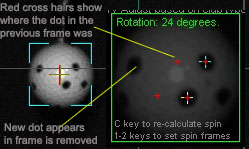
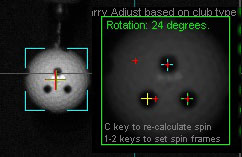

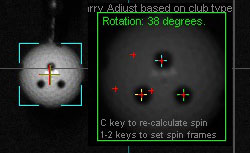
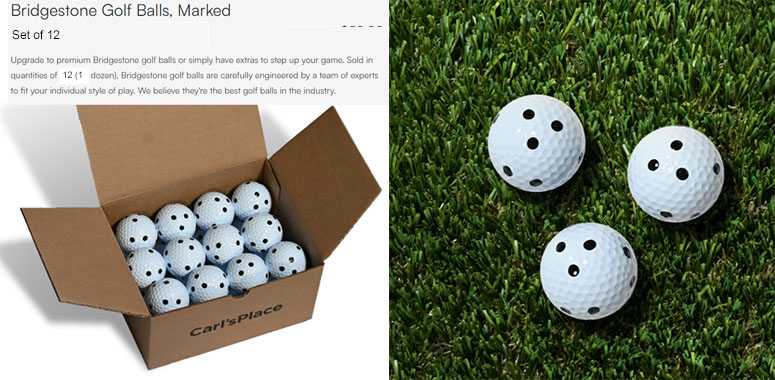
Note that only well defined and spaced spin dot balls can be used ( as hown above).
A maximum of 4 dots should only be visible within the center area of the ball.
Also note that camera exposure time (i.e. shutter speed) has to be set at or below 150 micro seconds and frame set to 1500 fps.
![]()
Technical Support


Email and remote access support is available for all original purchasers of GSA Golf systems.
E-mail support is free of charge for all original purchasers of GSA Golf systems.
Remote access support is available for all purchasers for $49 per session (max 1 hr per session)
Note that your 1 hour session can be divided up to 2 sessions of 30 min or 4 15min sessions
Remote support sessions are available 7 days a week (including weekends i.e. Sat or Sun) at 2pm ET
Remote access support requires that you have "TeamViewer" installed on your PC
Go to www.teamviewer.com to get your free team viewer installed
Buy GSA Golf remote support 1 hr session for
Price: $ 49.00
![]()
![]()

![]()

 Home
Home Sensors
 Cameras
 Software
 Enclosures
 GSA Courses
 E6 Courses
 Business
 Tech News