![]()
![]()

Installation and Setup

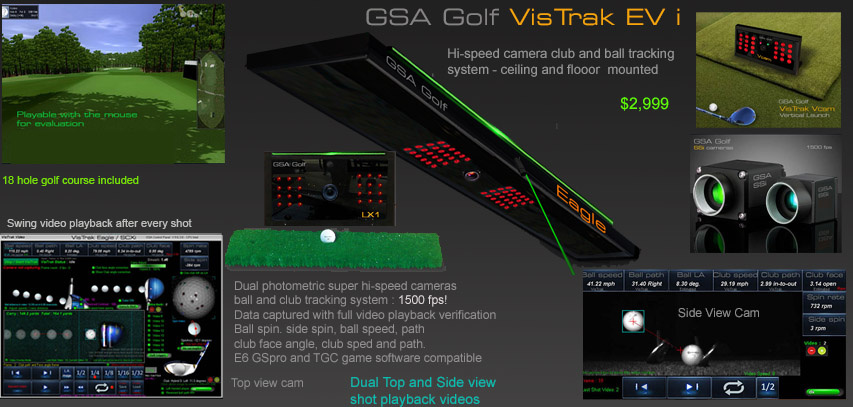
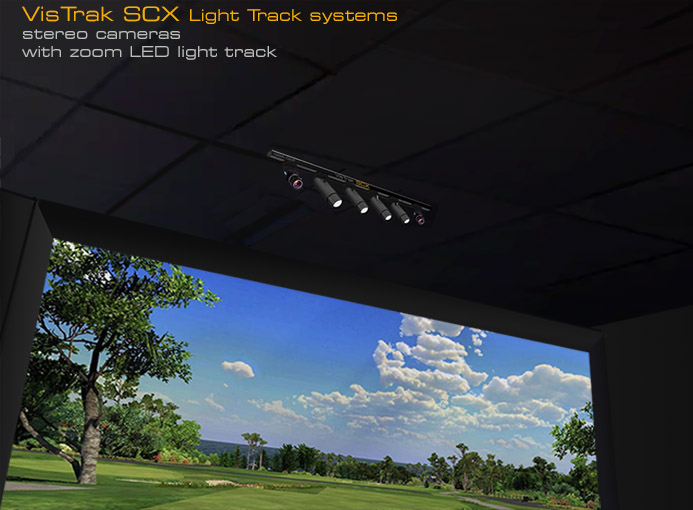
VisTrak Systems and Installation

Technical Support


Installation and Setup Steps
Download and install the Control Panel software


Important:
Download and Run the latest CP update after installing the full version from the tech news page if the update is newer
New GSA Golf Quick Guide Owners Manual
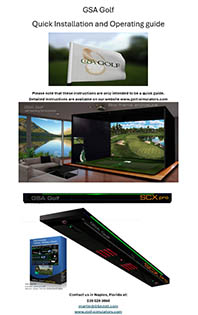
All systems are now supplied with the new quick guide Installation and Operating manual.
If you don't have this, then click the above image to download as a PDF.
For best results, copy to a thumb and take it to a local printing service like Office Depot
and have them print it out on high quality heavy gauge gloss paper - double sided.
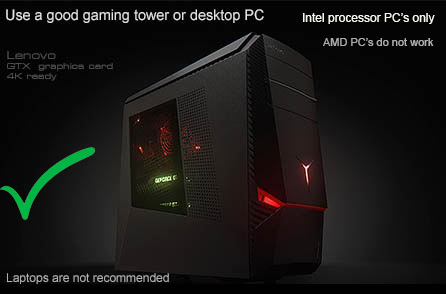
GSA Golf system minimum PC requirements
 -
-
Intel i5 or above Processor
Warning! Do not use PC's with AMD processors or low cost Laptops!
Warning! Do not use custom made PCs
Only use stock PC's
i.e. those that are available on Amazon in the $1,000 to $1,500 plus range
Our experience over the years has shown that the USB speeds with
custom made PCs do not meet the camera USB requirements.
8GB RAM Nvidia 1070 Graphics Card or equivalent
25GB of Hard Drive Space
Windows 10 or 11 (Required)
Internet Connection
(Required if using 3rd party game software such as E6, TGC or GSPro)
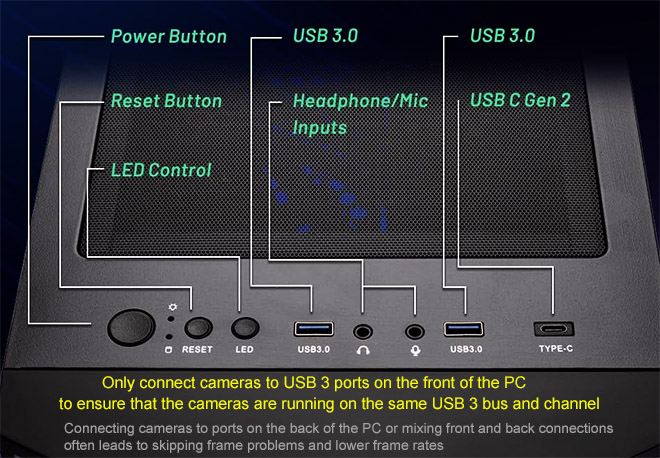
2 x USB3.1 or 2 x USB3.2 ports (Required)
Note: The cameras are USB3 cameras
and will only run at the correct speed when connected via USB3 cables directly to separate USB3 ports
at the front of the PC.
USB Ports at the back of the PC don't usually work well
Warning
If using 2 cameras, do not connect the cameras together with a Hub !
All cameras must be directly connected to separate USB3 ports on the PC
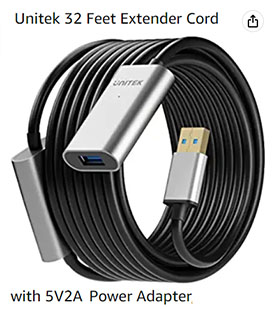
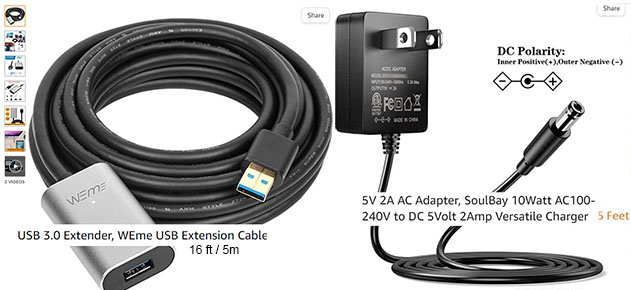
Use only powered USB3 extension cables if the supplied cables are not long enough
![]()
Warning! Do not use older PC's that have been modified in anyway
(i.e. new mother board, additional USB3 cards etc)
Experience has shown that the high-speed cameras do not function with such older or modified PCs
![]()
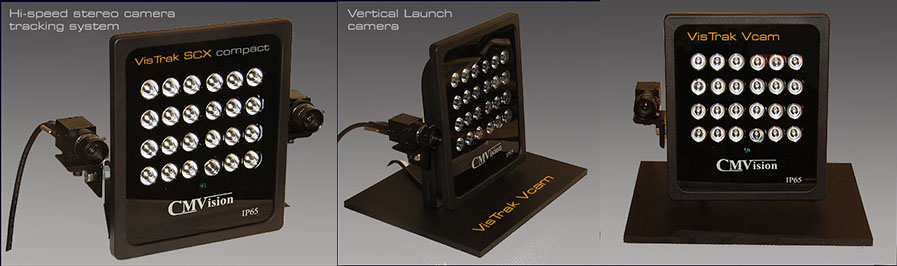
VisTrak camera setup videos
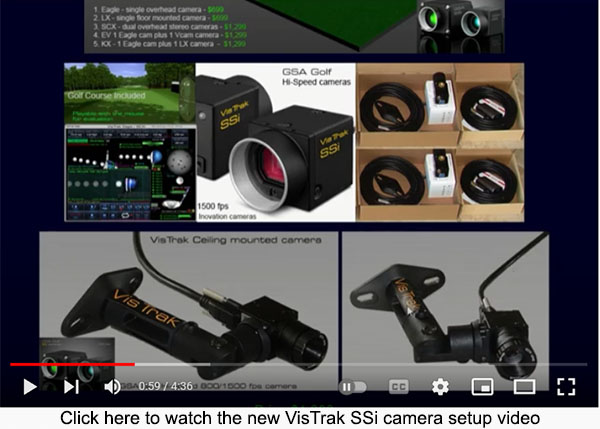
Click above image to view all VisTrak setup YouTube videos
![]()


Click above to read
![]()
SCX Installation


Click the above button to go to the SCX installation page
![]()
Eagle Installation
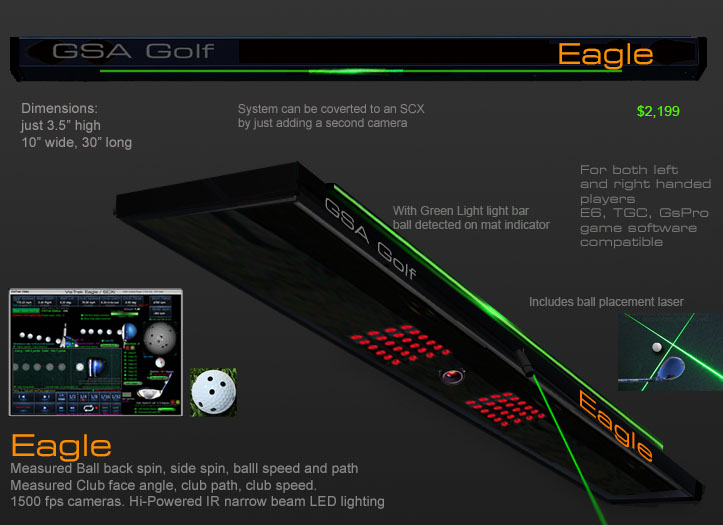

Click the above button to go to the Eagle installation page
![]()
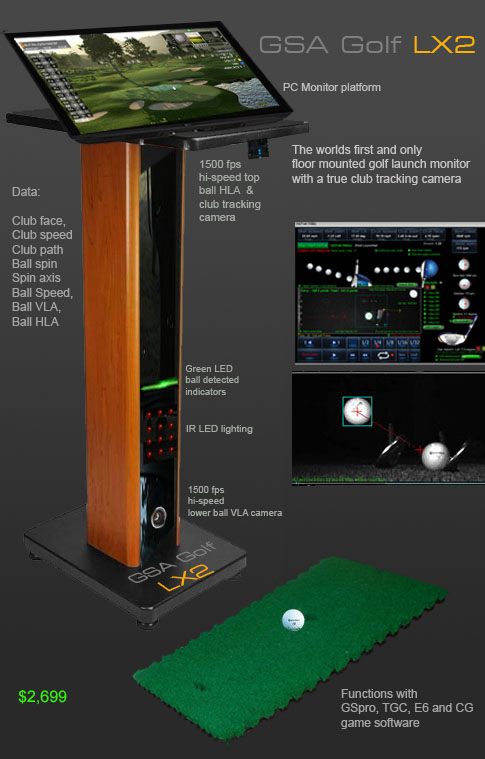
LX/KX Installation

![]()
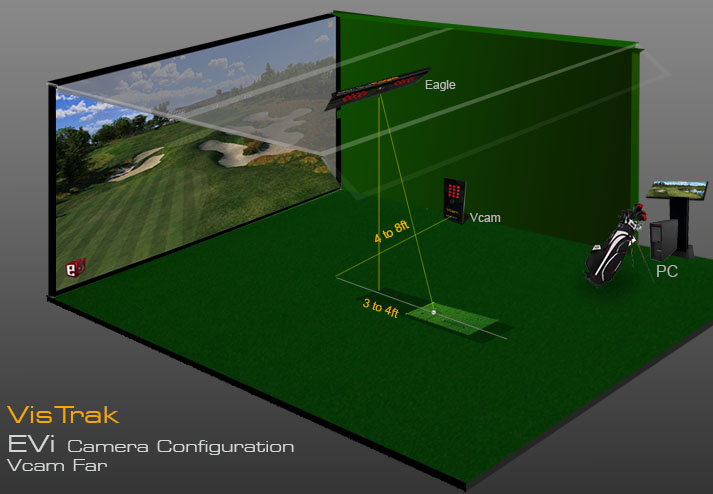
EVi Installation

![]()
Ball Spin Setup

![]()
Club Detection Setup

Click above to read how the system detects club data with or without reflective stickers
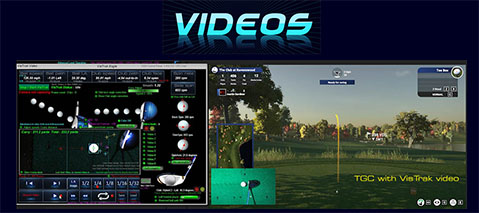
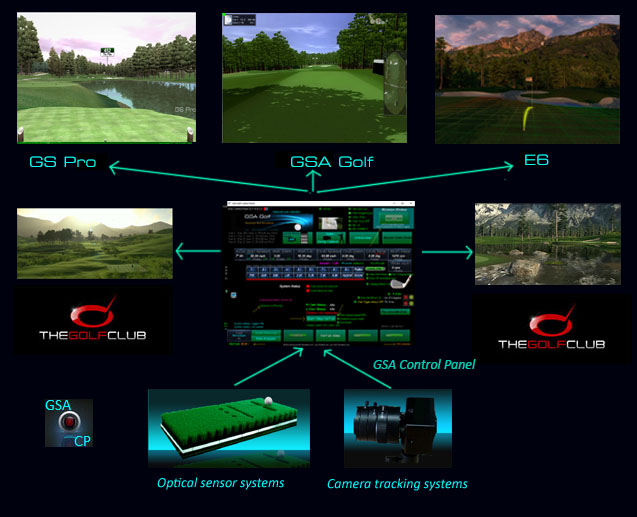
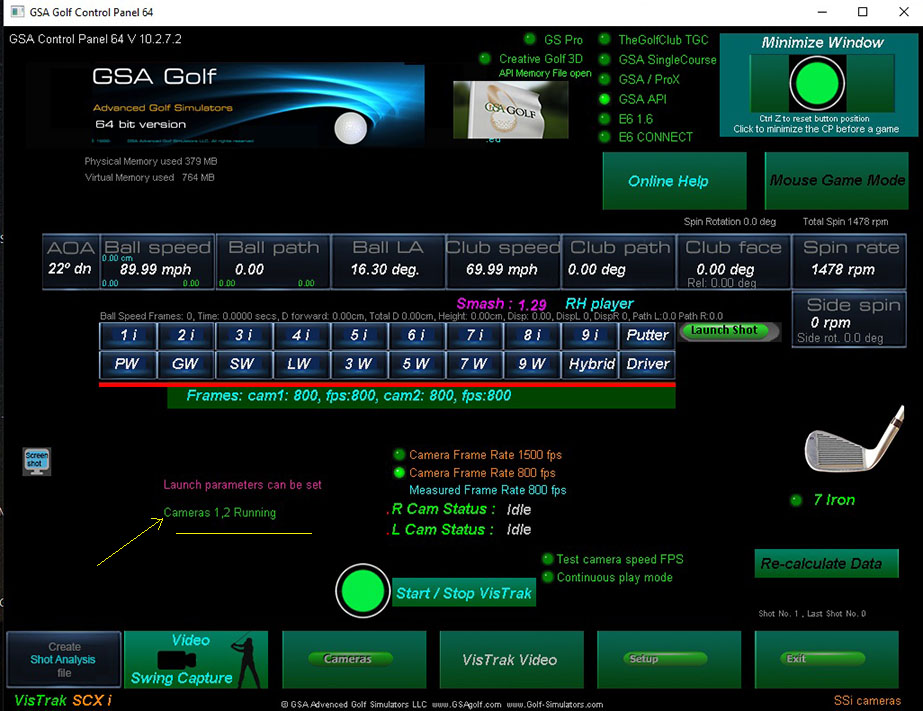
VisTrak Golf Game Play
How to play a golf game with the system
VisTrak interfaces with TGC (The Golf Club), GSA ProX, GS Pro, RedChain, E6 1.6 and E6 Connect golf game software.
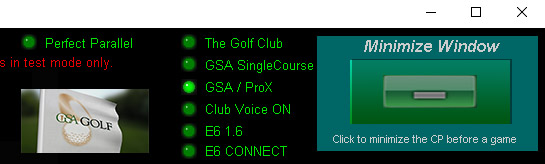
Select the game software you are using from the radio buttons at top right corner of the Control Panel's main window.
Click the large "Minimize Window" button to start the cameras and connect to the game.
Start your golf game application.
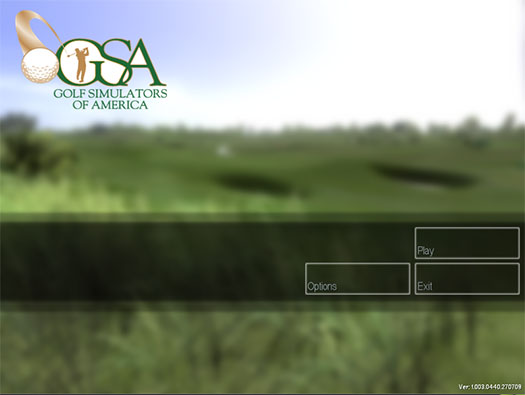
If you haven't already purchased any game software, you can use the supplied GSA 18 hole golf course demo software.
In this case, select the GSA Single Course radio button.
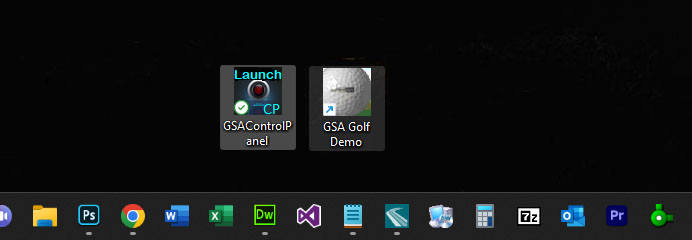
Then click the GSA Golf Demo icon from your PC's desktop

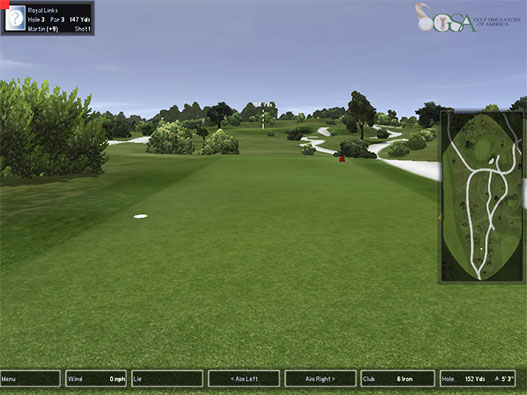

After Clicking the large "Minimize Window" button in the CP,
2 small buttons will show at the top left hand side of the game software.
The system will then start to look for a ball in the Launch Zone area. The top button is then red.
Once a ball has been detected in the Launch Zone area, the button turns green indicating that the system is ready for the swing.
Note: Click "GSA Golf Control Panel" button to go back the expanded CP's main window
Click Show Swing Video to see the last shot video

Note that the ball must always be placed in the launch zone area in order for it to be detected
Once the ball has been detected in both cameras, the system is ready to capture a ball strike and send the data to the game software in order to launch the ball.
VisTrak Lighting options
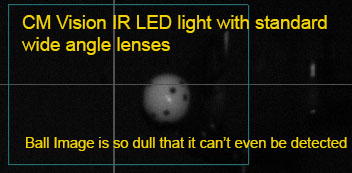
If you have purchased just the cameras, the following lighting is recommended.
IR LED Lighting
CM Vision IRP24-850nm LED IR Array Illuminator
Min 3 required for ceiling mounted SCX and Eagle systems
Max mounting height is 9ft
Note that the power supplies are not included when purchasing on Amazon
You will require 5 amp 12v power supplies for this IR Illuminator
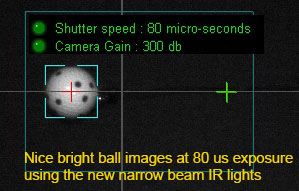
GSA Golf Hi-intensity CM Vision IR narrow beam lights
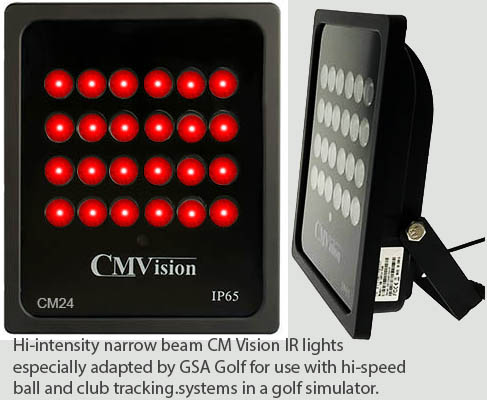
 -
-
Price $349 each
(2 required for the SCX)
![]()
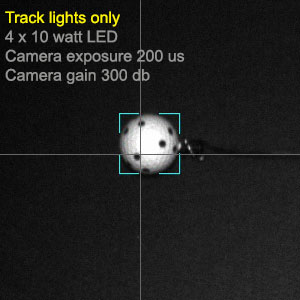
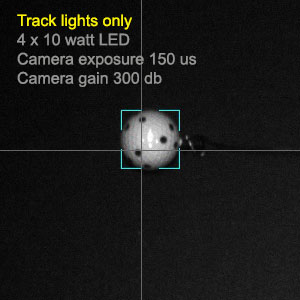
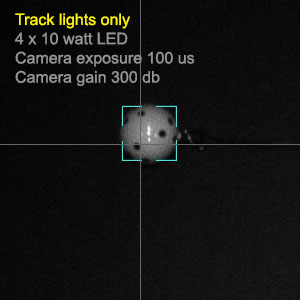
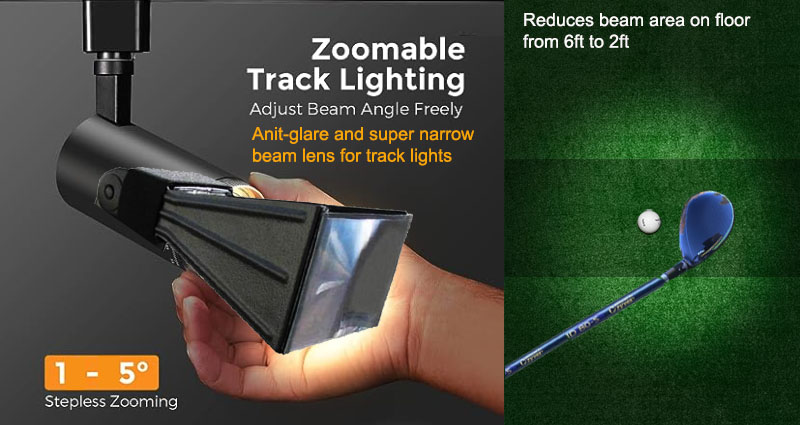
Track Lighting
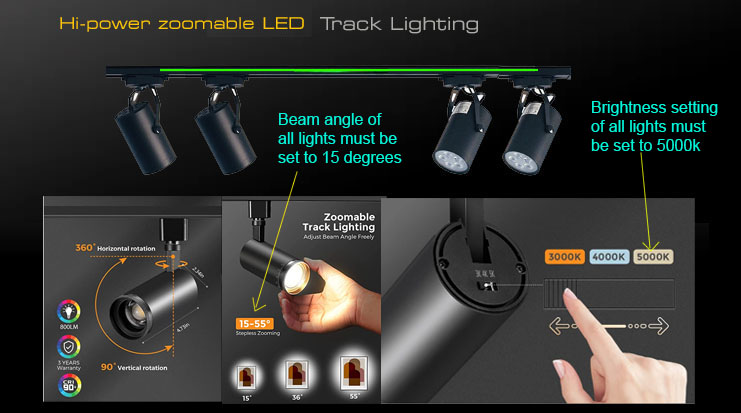
4 hi-power LED zoom-able track light system with 800 Lumens per light with track
Price $199
4 hi-power LED zoom-able track light system with 800 Lumens per light with track with LED light strip system ready indicator
Price $299
Track lighting image brightness examples
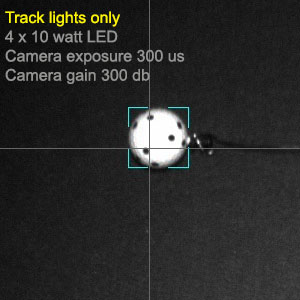
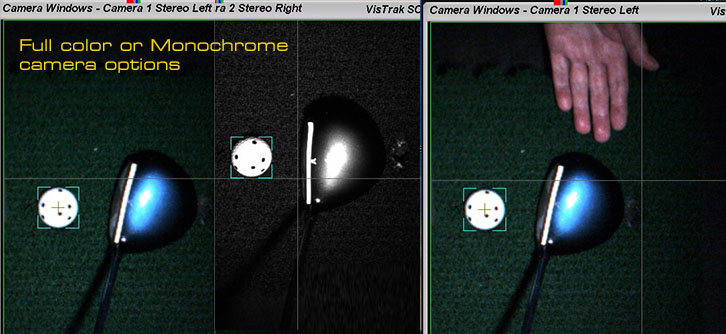
Choose between color or monochrome cameras
Price $39 each
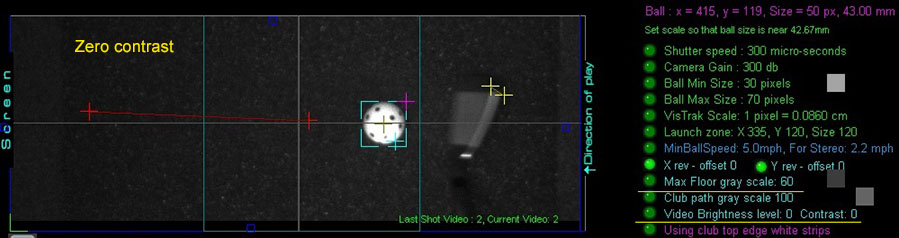
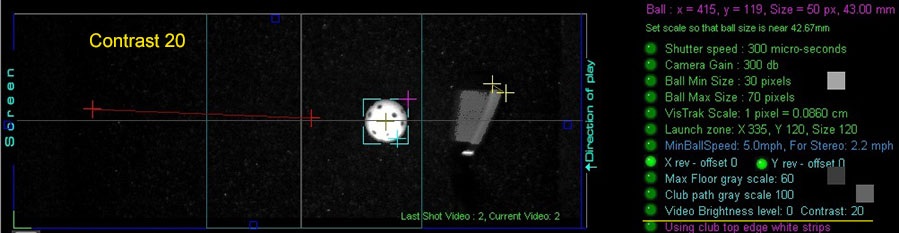
Improving image ball and club detection
using a lower "Ball Brightness" setting
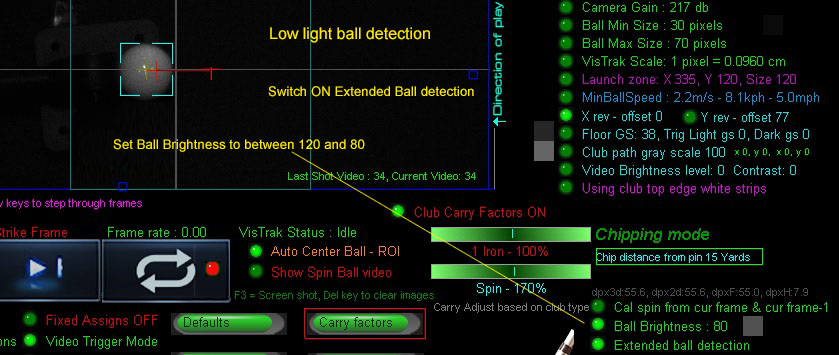
Use the new "Ball Brightness" setting to improve ball detection without the requirement to adjust contrast settings
Note that this feature is only available as of CP version 9.8.8.8
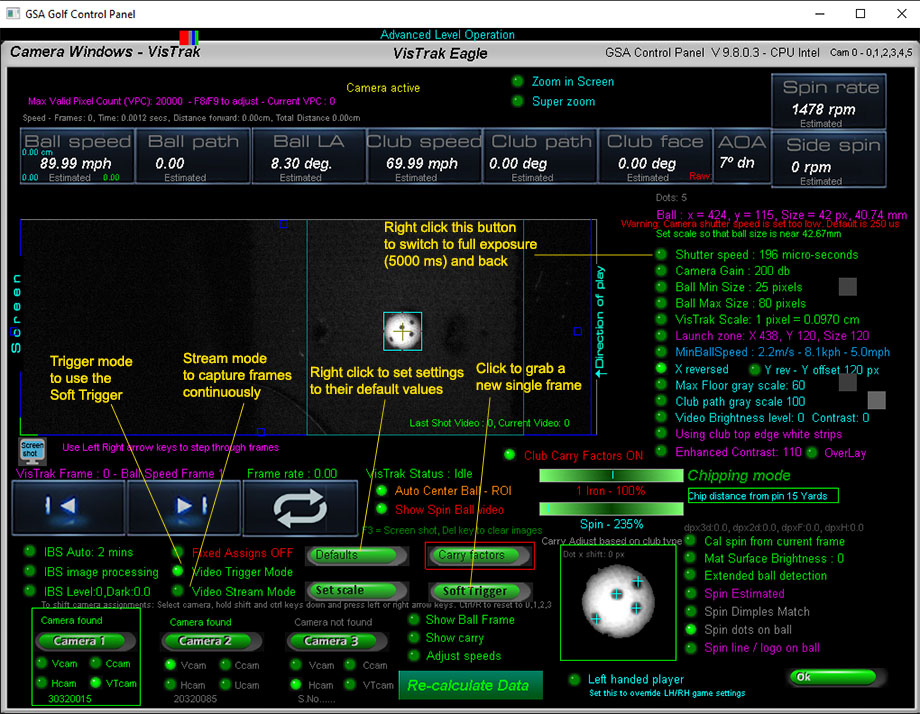
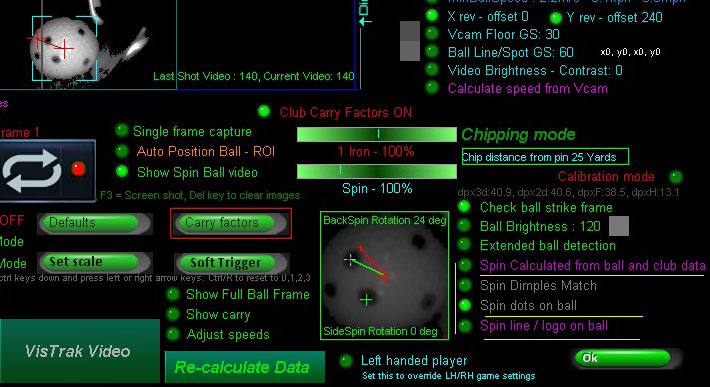
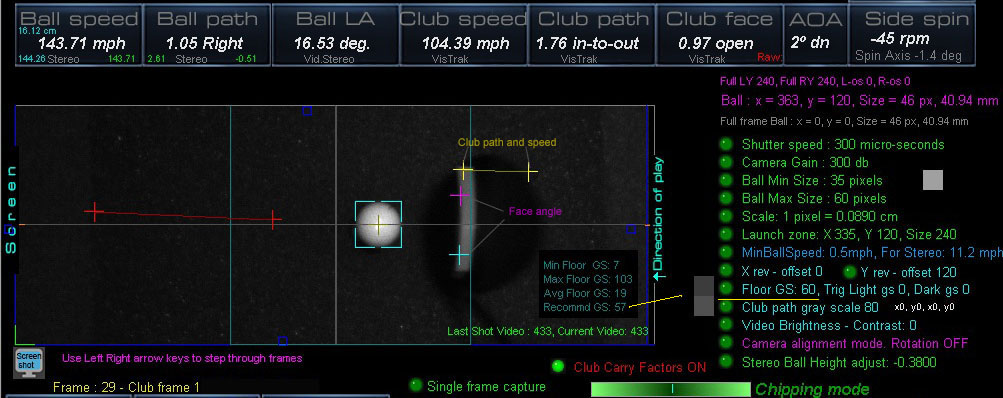
The CP Camera window
Improving image ball and club detection
using higher Contrast settings

Ball images using 3 24 IR LED lights

Ball images using 2 24 IR LED lights

Ball images using 1 24 IR LED light

Ball images using 2 50w 12 degree spot halogen lights
As can be seen, just 2 50 watt halogen lights easily out perform the 24 IR LED lights - even without having to increase the contrast settings
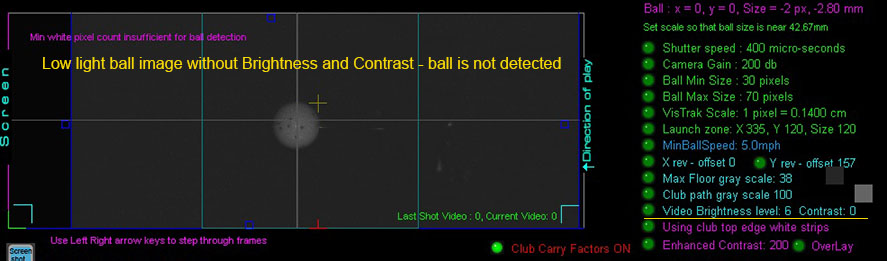
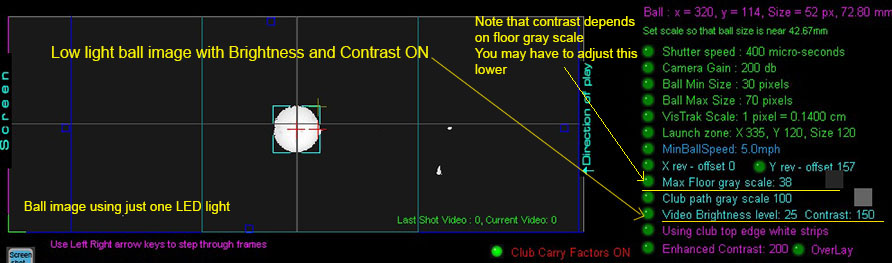
When using just one LED light, the "Contrast" setting has to be increased in order that the ball and club is detected
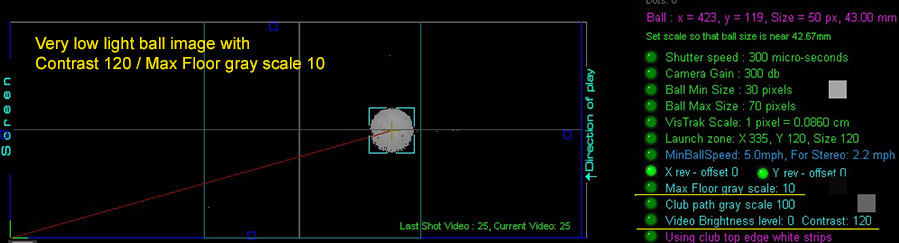
How the Floor GS (Grey Scale) setting effects the brightness/contrast setting.
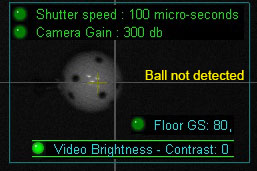
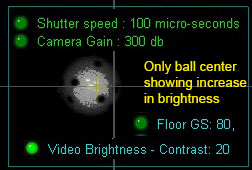
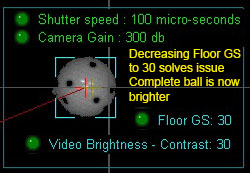
If your lighting is insufficient to illuminate the ball so that it is detected when using fast shutter speed,
you will have to increase the Brightness/Contrast level.
In so doing, you may find that only the center of the ball is showing an increase in brightness.
This is because the brightness procedure is only increasing the brightness of pixels that have a GS above the floor GS level.
The idea is to only increase the brightness of the ball itself and not the surrounding floor so that a stronger contrast is made between the ball and the floor.
It is thus important that the Floor GS setting is set closer to the actual floor gray scale in order to increase the brightness of the complete ball.
![]()

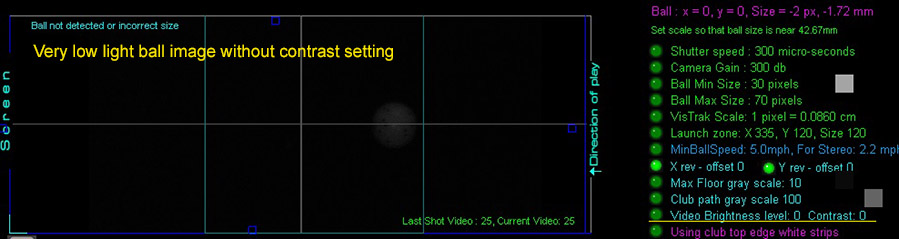
You can also improve ball and club image detection even when using mulitple IR LED or Halogen lighting setups.
Note that if the contrast is set too high, then ball markings will wash out
![]()
Fault finding and Issues

![]()
Technical Support
Email and remote access support is available for all original purchasers of GSA Golf systems.
E-mail support is free of charge for all original purchasers of GSA Golf systems.
Remote access support is available for all purchasers for $75 per session (max 1 hr per session)
Remote access support requires that you have "TeamViewer" installed on your PC
Go to www.teamviewer.com to get your free team viewer installed
Buy GSA Golf remote support 1 hr session for
Price: $ 75.00
![]()
Shot Replay Videos
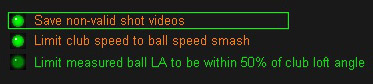
Important !
If your system is not detecting a valid shot, click the option
"Save non-valid shot videos" ON
in the CP Setup Panel
Retry a shot and make note of the shot Video number being saved.
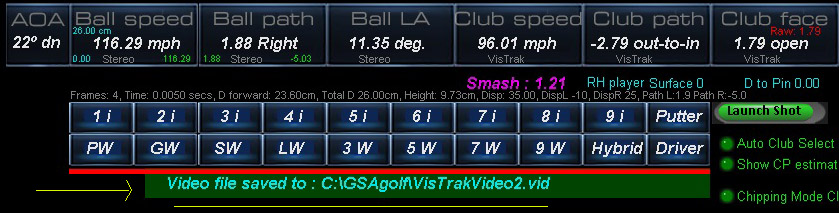
After a shot, the shot video file name and number is displayed in the CP's main panel
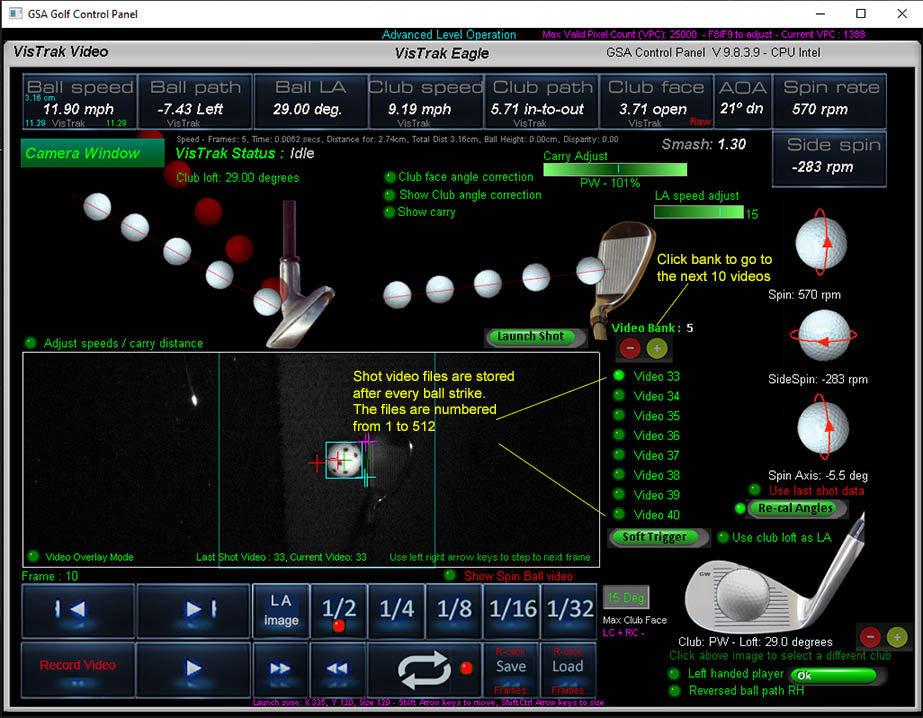
The Vistrak system stores a shot video after every shot.
These shot videos can be re-called by clicking on the video number.
GSA Golf Technical support often requires the user to send us a copy of one or more of these shot videos
as an email attachment for analysis when issues occur.
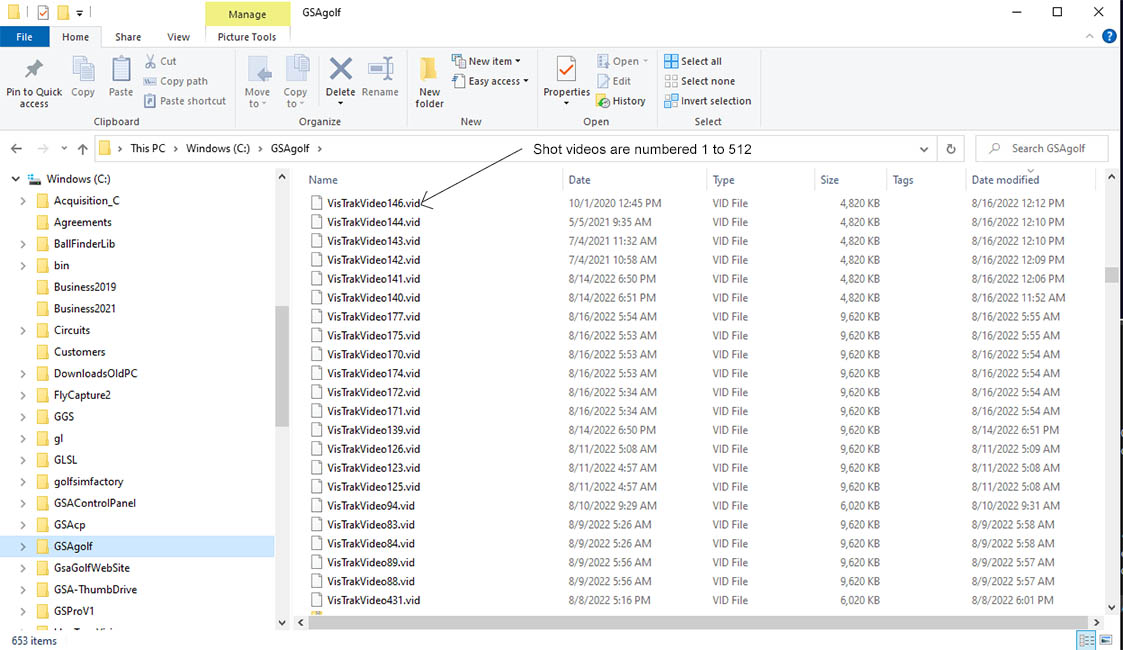
The shot video files are stored in the C:\GSAgolf folder on your PC
![]()
How to make Screen shots
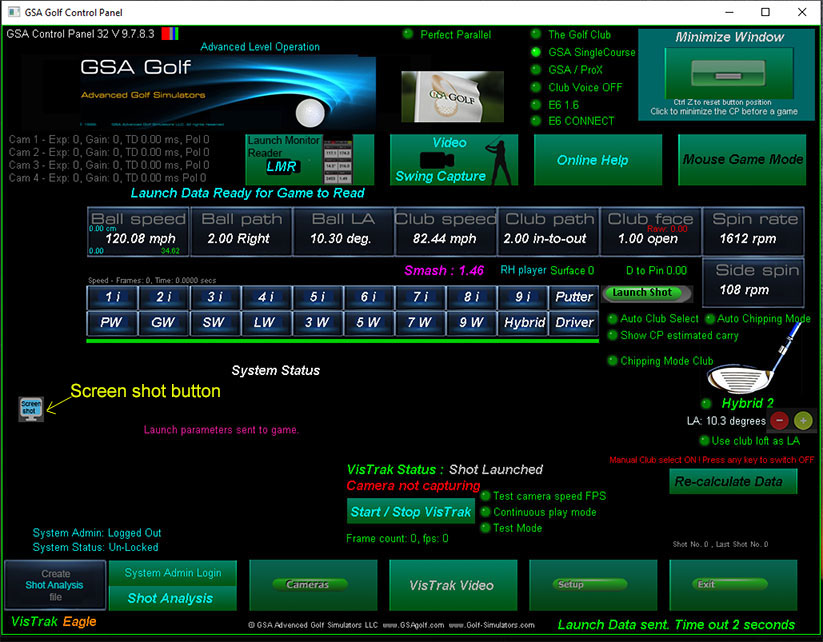
GSA Golf Technical support often requires the user to send us a control panel screen shots
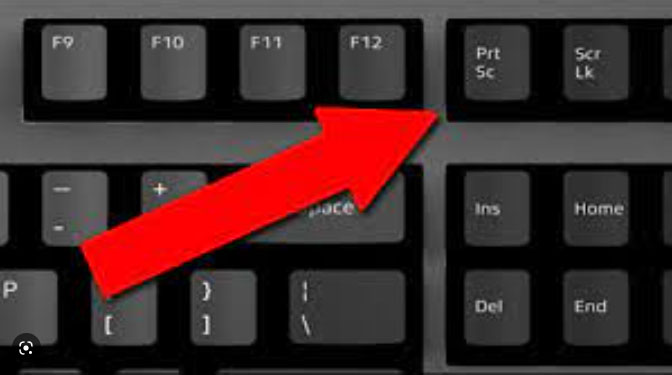
To make a screen shot, press the PrtSc button on your keyboard.
Note: some CP screens have a Screen Shot button too.
This places a copy of the screen image into the PC's Clipboard.
You can then paste the image into the Paint application and save it.
Alternatively
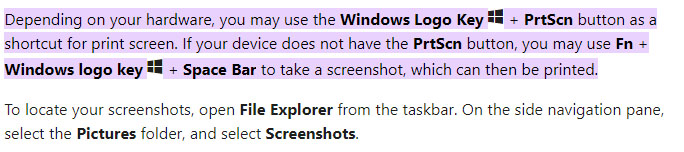

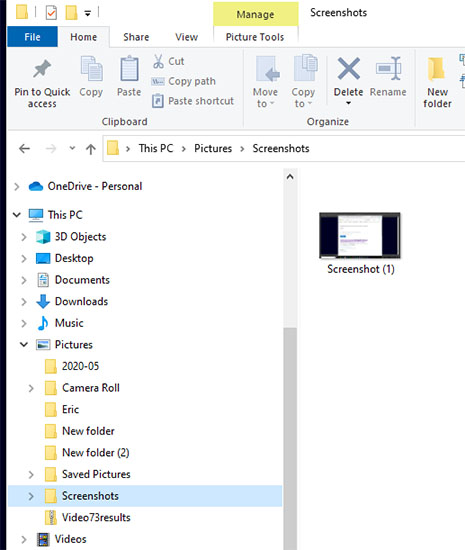
You can then either paste or attach the image in an email to us for analysis
![]()
Installing TeamViewer
If you require remote access support, you need to have TeamViewer installed on your PC.
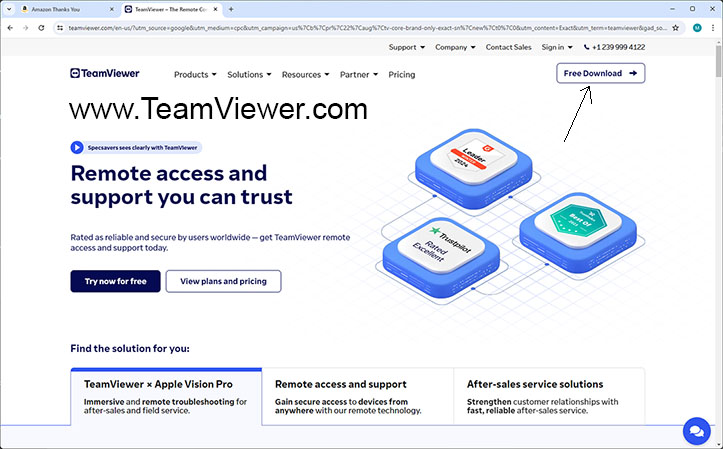
Go to www.TeamViewer.com or click the above image to download the free version of TeamViewer
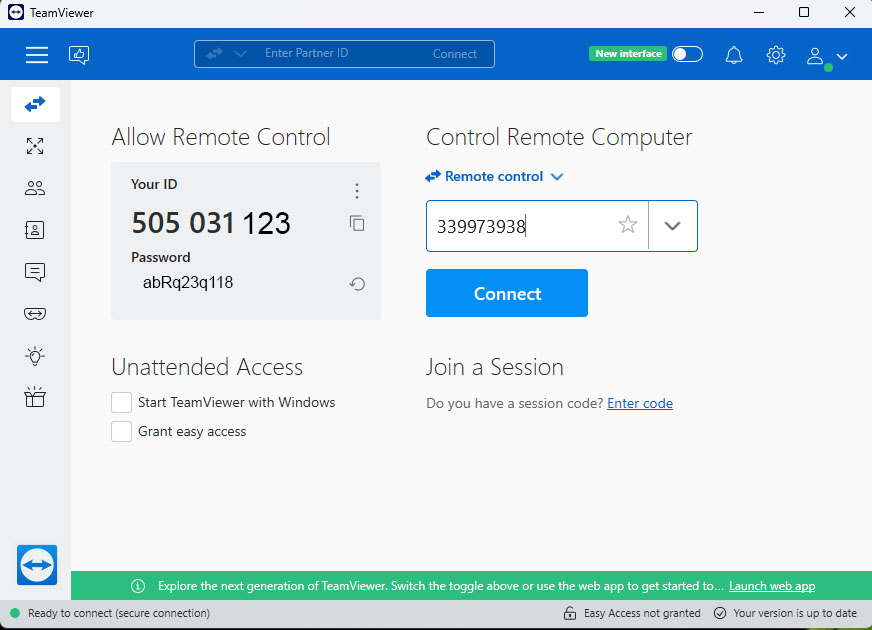
When calling us for a remote access support session, have your TeamViewer up and running with your ID and Password being displayed.
![]()
Checking Cameras
with the Camera manufacturers applications
Using the HuaTeng Vision application to check the cameras
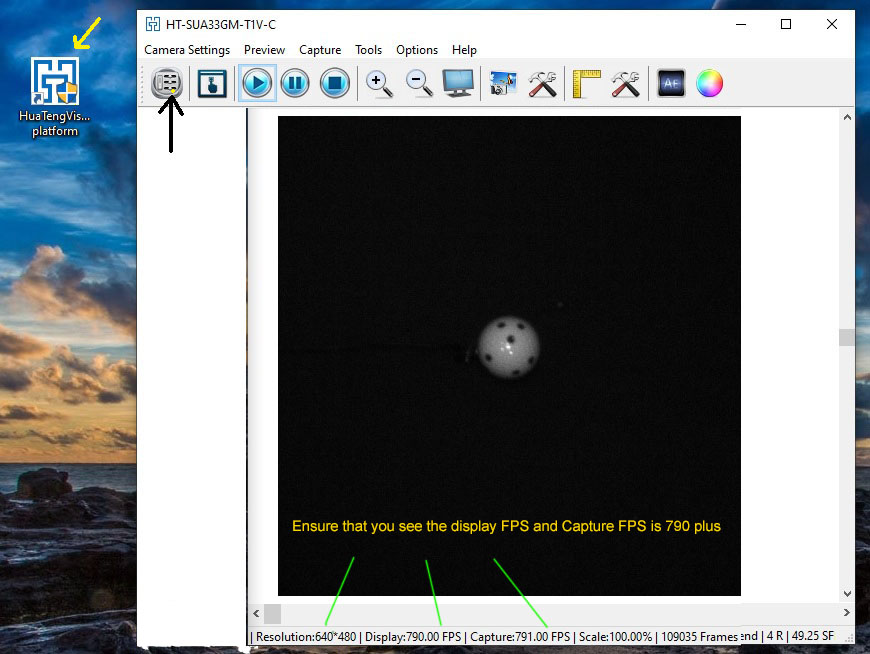
You can use the HuaTeng Vision application to check that the SSi cameras on your PC are running at the correct speed
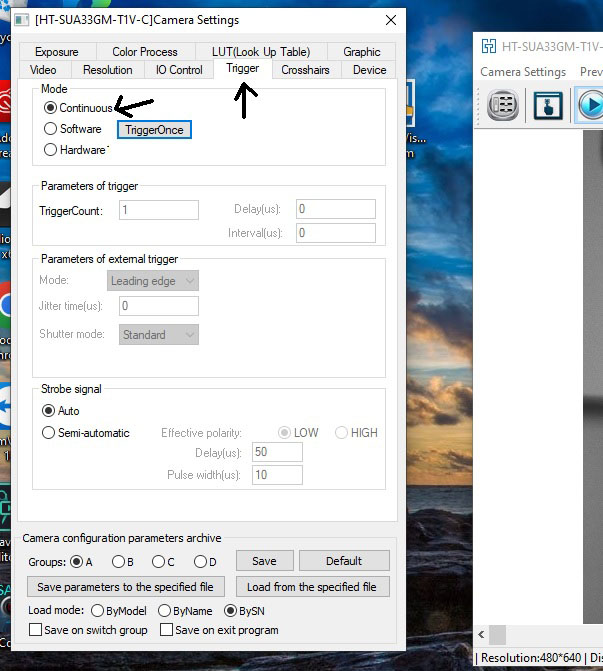
Select "Continuous" in the Triiger panel to start grabing frames
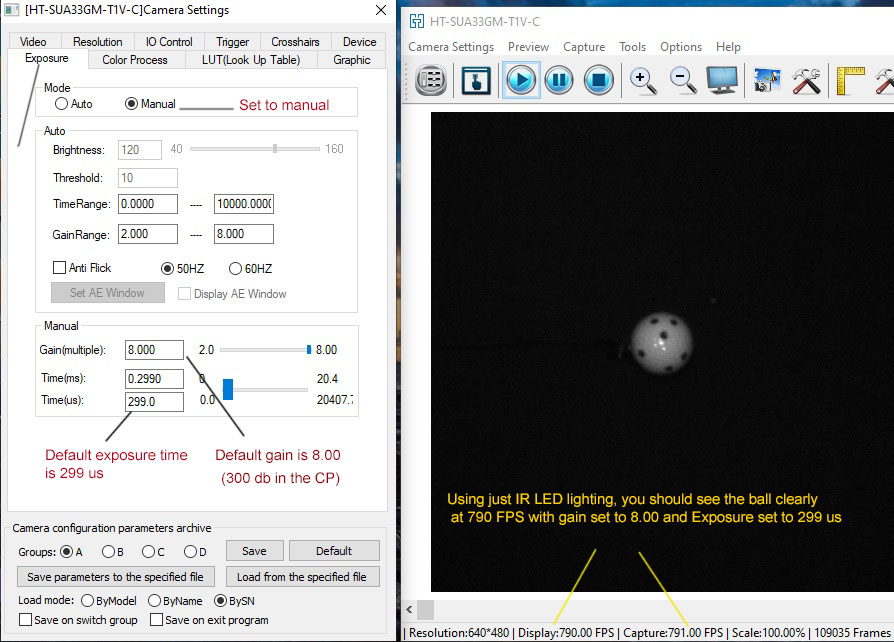
Select "Manual" in the Exposure panel.
Set gain to 8.00 and Exposure time to 299 us
You should see at least a camera FPS rate of 790 FPS.
If not, then you are not connecting the cameras to USB3 ports on the front of the PC
or you are using USB2 extension cables
or not using the 5v adapter with the extension cables
![]()
Installing the Control Panel software
Follow the download links sent to you via email
The GSA Golf Control Panel (CP) interfaces the cameras to the game software
and performs all the camera image processing to calculate the shot data
Error message when first starting the CP ?
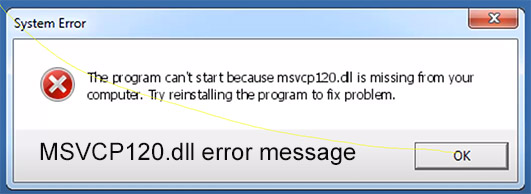
If you see the above error message when first starting the Control Panel (CP)
then your PC requires the VC Redistributable files.
Click on the above image to see an installation video
Download VC redistributables hereHere
The CP main window
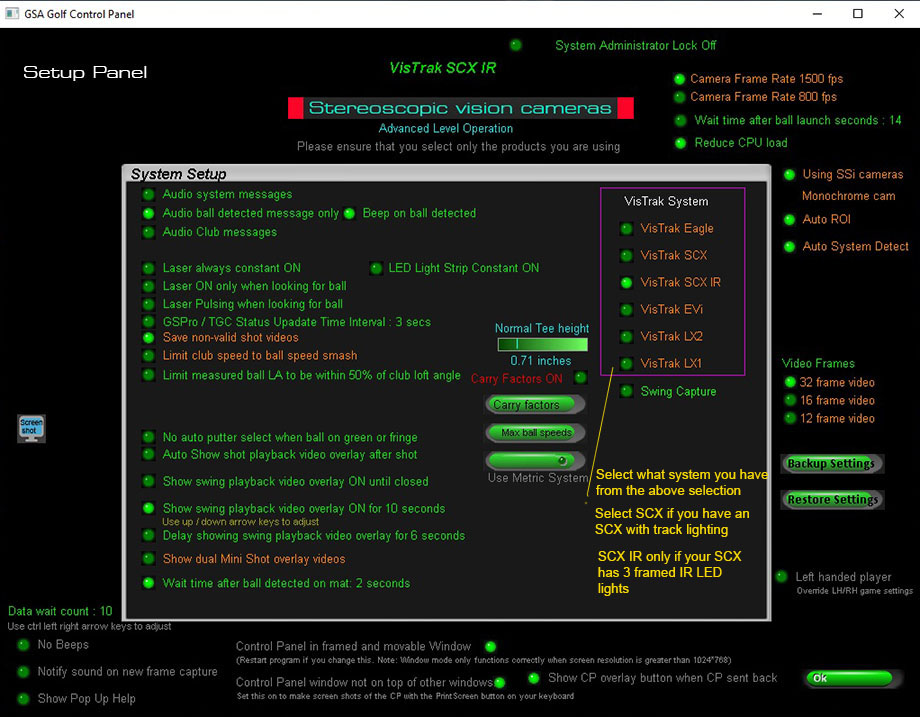
The CP Setup Panel
More helpful links...


![]()

![]()
 Home
Home Products
 Cameras
 Software
 Enclosures
 ProTee
 E6 Courses
 Business
 Tech News