![]()


![]()
VisTrak EVi Installation
Installation Steps
Step 1.
Download and install the Control Panel software

Step 2.
Install the camera driver software from the supplied USB drive
Step 3.

Click the above button for detailed camera installation instructions
Connect cameras to USB3 ports on your PC
Step 4.
Start the Control Panel and ensure that both cameras are running
(i.e. there's no error messages and you see the message that 2 cameras are running)
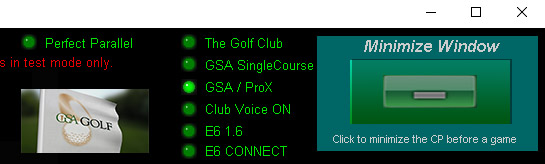
The CP main window
Depending on what system you have, you should see either 1 or 2 cameras are running
Step 5.
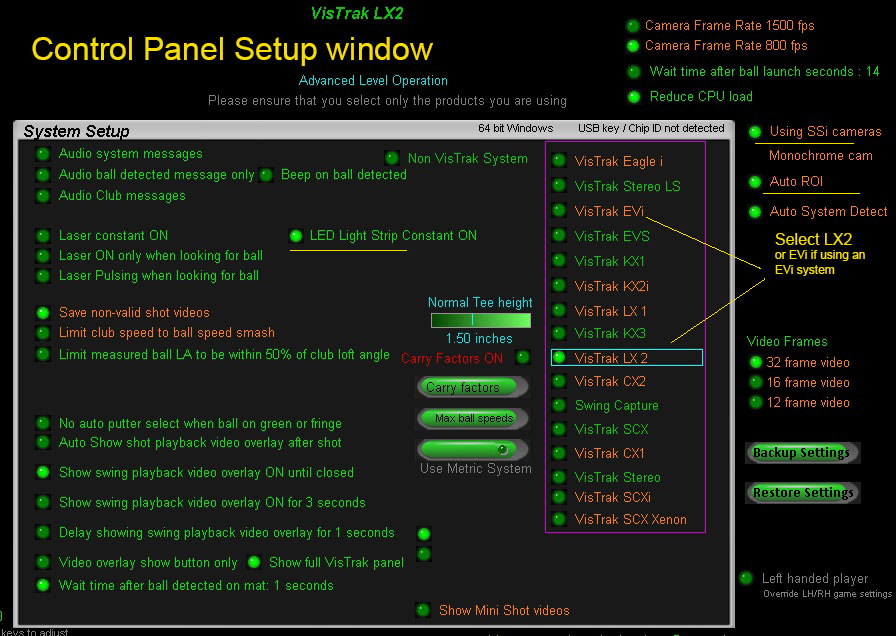
Go to the Setup panel and select Vistrak EVi / SCX / LX2 (depending on what system you have)
from the list of systems on the right hand side of the screen
Step 6.
Go to the camera 1 panel and right click on the "Defaults" button to set all settings to their default values.
Step 7.
With a ball placed on its normal launch position on your mat,
select the "Show Full Ball Frame" option and the "Video Stream Mode" option and aim the camera so that it appears close to the center of the screen
Step 8.
Do the same for camera 2.
Step 9.
Go to camera 2 in the camera panel and switch OFF "Show Full Ball Fame"
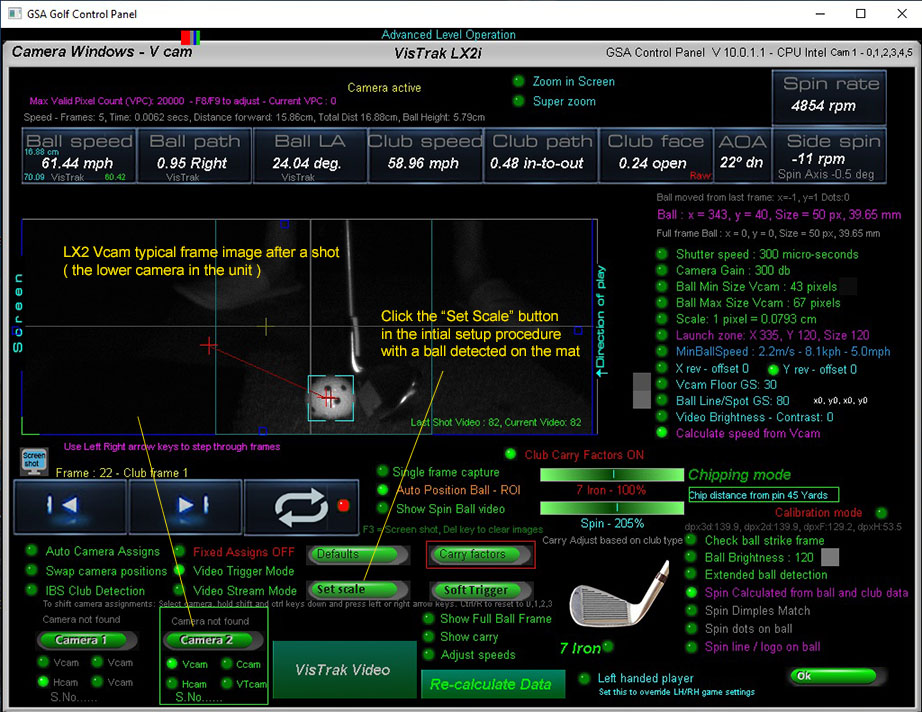
Click on the "Soft Trigger" button to grab a new image of the ball on the mat and click the "Set Scale" button.
Step 10.
Click on the Start Cameras button in the Control Panel's main window
(or click the large Minimize button at the top right side of the panel)
and wait a second or 2 until you see the message " ball detected, ready for swing"

You are now ready to play the ball
Step 10.
after a ball strike, you should see the message "Ball launch detected. Launch parameters sent to the game software"
Step 11.
Start you golf game software (E6, GSpro, TGC, CG3d or GSA Golf) and click the large minimize button at the top right of the screen .
You are now ready to play a round.

![]()
Fault finding and Issues

![]()
GSA Golf system minimum PC requirements
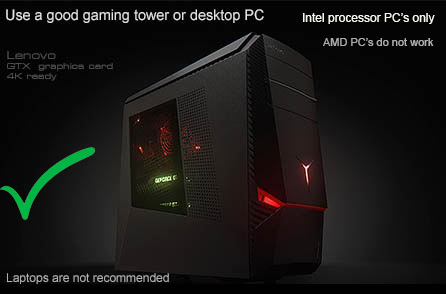
Intel i5 or above Processor
8GB RAM Nvidia 1070 Graphics Card or equivalent
25GB of Hard Drive Space
Windows 10 or 11 (Required)
Internet Connection
(Required if using 3rd party game software such as E6, TGC or GSPro)
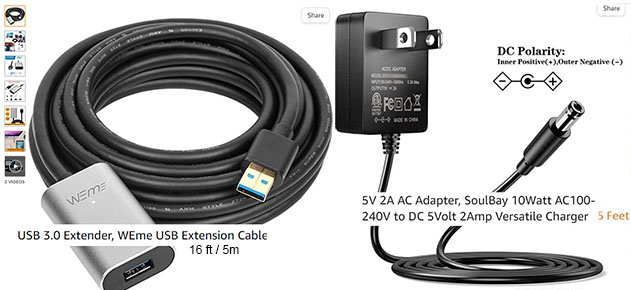
EVi wiring
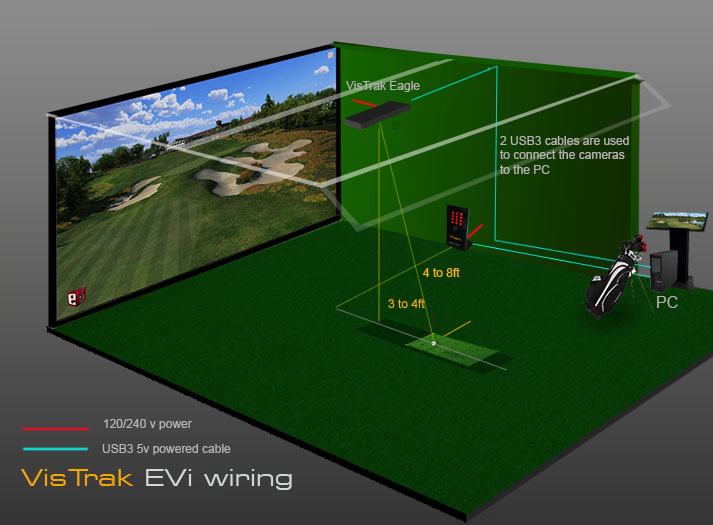
2 X USB3 ports (Required)
Note: The cameras are USB3 5v powered cameras
and will only run at the correct speed when connected via USB3 cables directly to separate USB3 ports on the PC
Warning
If using 2 cameras, do not connect the cameras together with a Hub !
All cameras must be directly connected to separate USB3 ports on the PC
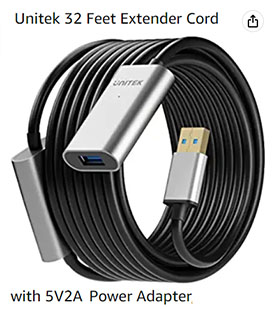
Use only powered USB3 extension cables if the supplied cables are not long enough
![]()

Click above button to read
![]()
Both Far and Near lenses are supplied for the floor mounted Vcam
so you can choose which layout you prefer.
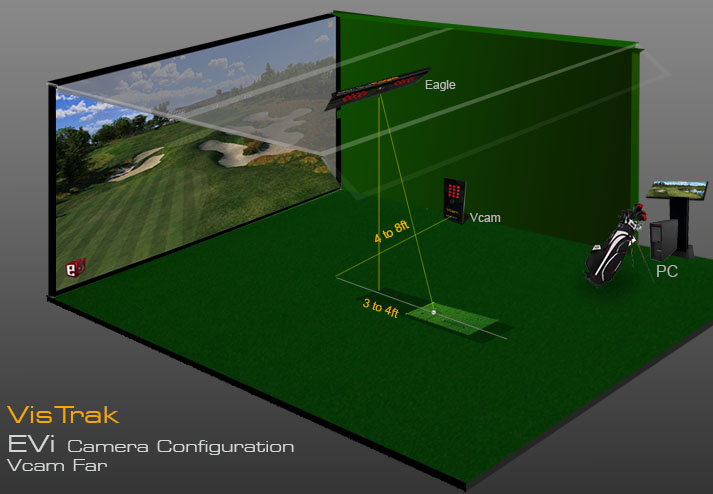
The Far VisTrak EVi system layout functions for both LH and RH players without the requirement to move cameras,
and detects all data including ball spin.
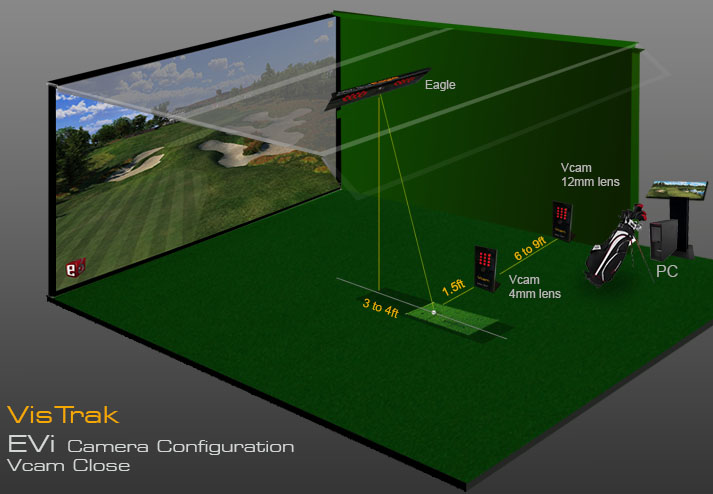
When mounting the cameras in the EVI LX close configuration layout,
ball spin is measured but the floor mounted camera has to be moved if swapping LH and RH players.
VisTrak camera setup videos
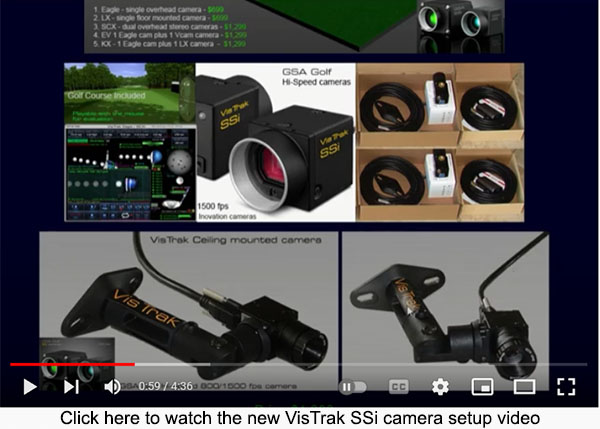
Click above image to view all VisTrak setup YouTube videos
![]()
The CP's setup panel
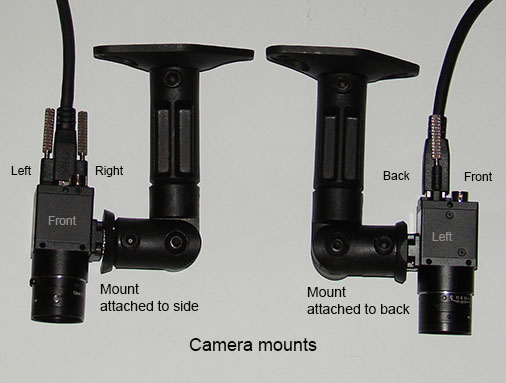
Depending on which side of the camera the mount is attached,
cameras may have to be rotated in order to obtain the correct orientation
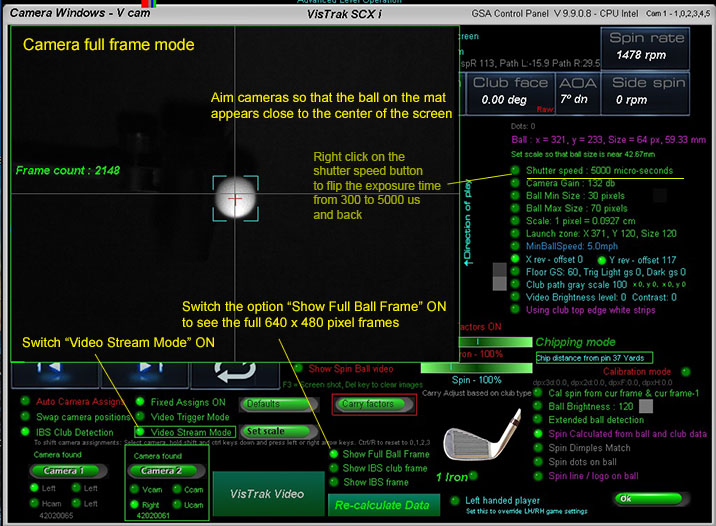
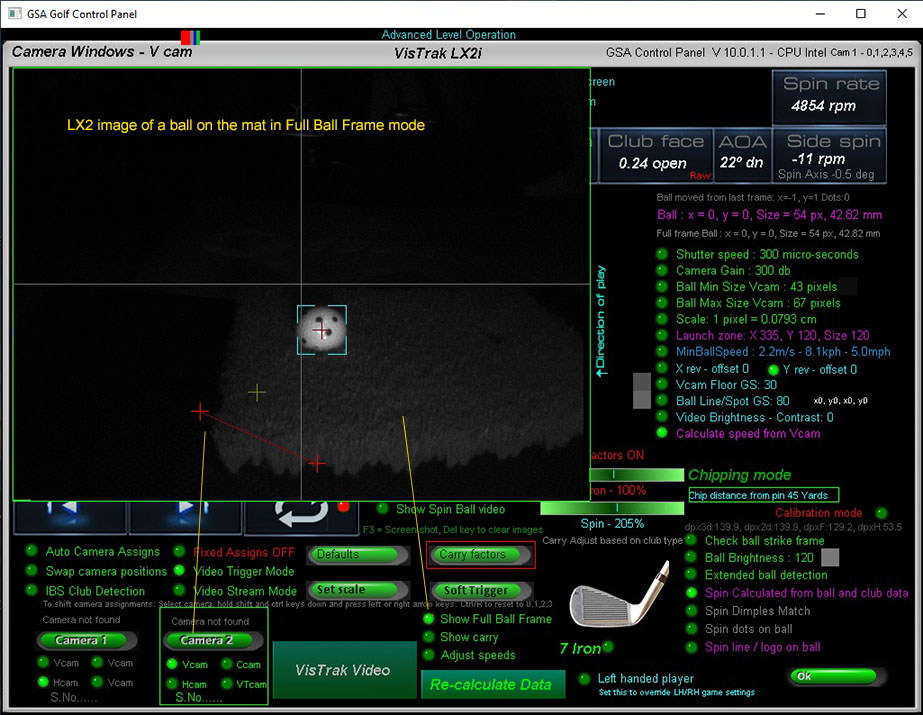
When aiming cameras, switch the options "Show Full Ball Frame" and "Video Stream mode" ON
With the "Show Full Ball Frame" and "Video Stream Mode" options switch on in the camera window,
ensure that the ball in both cameras appears approximately in the center of the images as shown above.
It doesn't have to be exact as the cameras will position the ball automatically.
![]()
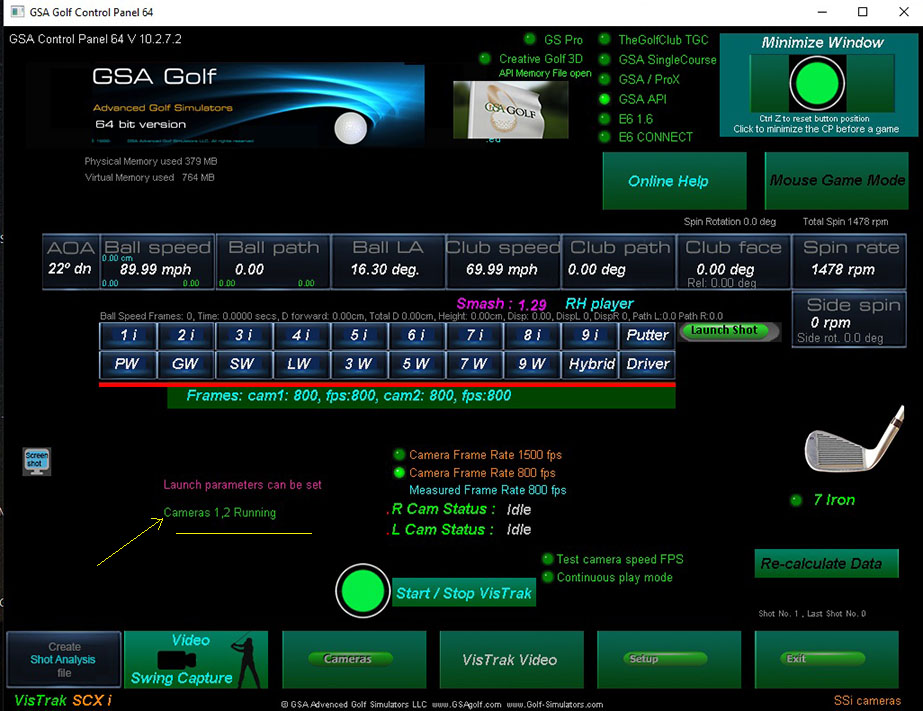
The CP's main window
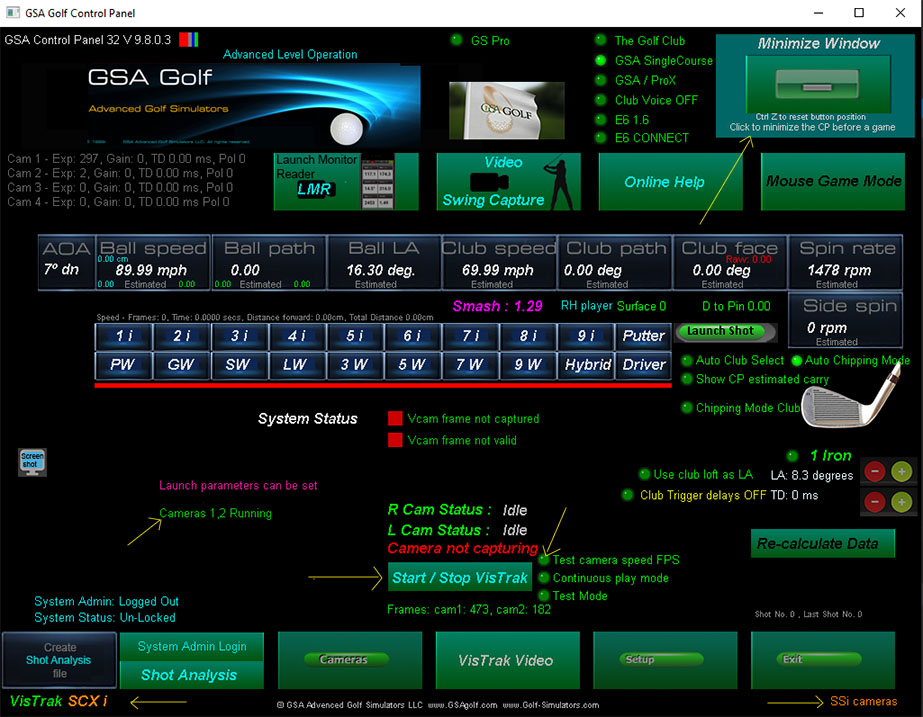
After the the camera drivers are installed and you start the Control Panel (CP) with the cameras connected to the PC
you should see that cameras 1 and 2 are running.
![]()
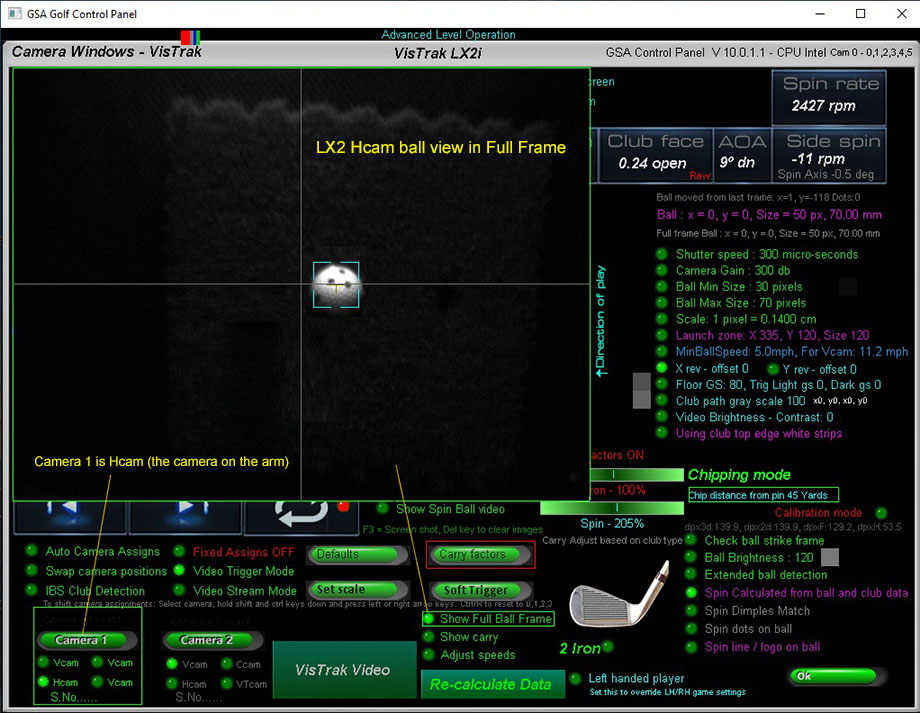
The CP's camera windows
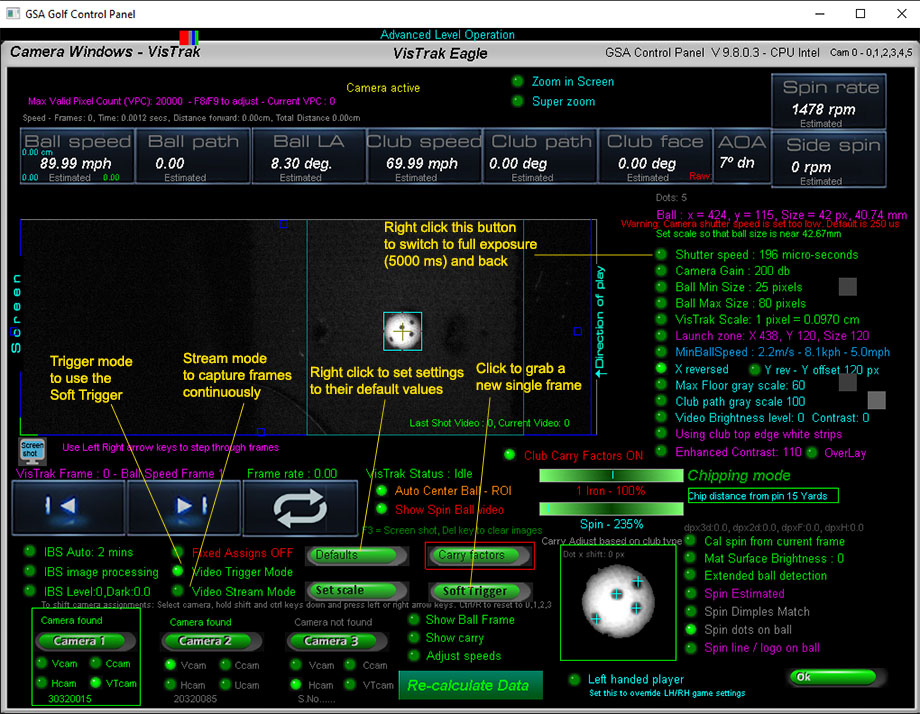
Right click on the "Defaults" button in both cameras 1 and 2 to set all settings to their default values.
![]()
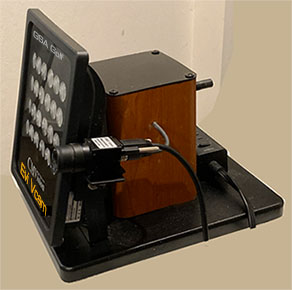
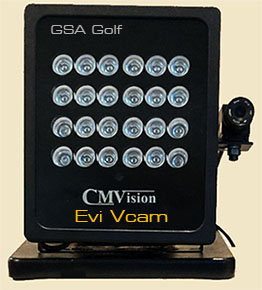
The EVi system is a combination of a VisTrak Eagle overhead mounted camera and a floor mounted LA Vcam (Vertical Launch Angle) or LX (LA and Spin) camera.
As such, the instructions for the VisTrak Eagle will apply for the ceiling mounted camera

![]()
Improving Ball detection using camera "Contrast" settings
New camera image and brightness controls that turn low light dull images of the ball and club into vibrant bright images.
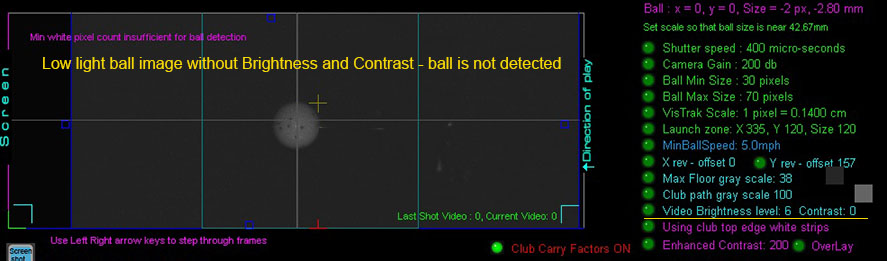
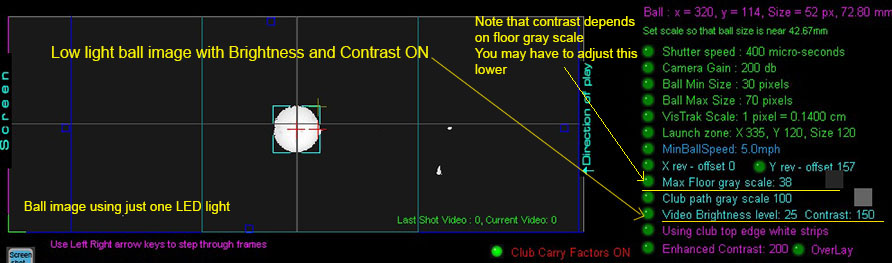
Click above images to read more about improving camera ball detection and Contrast settings
![]()
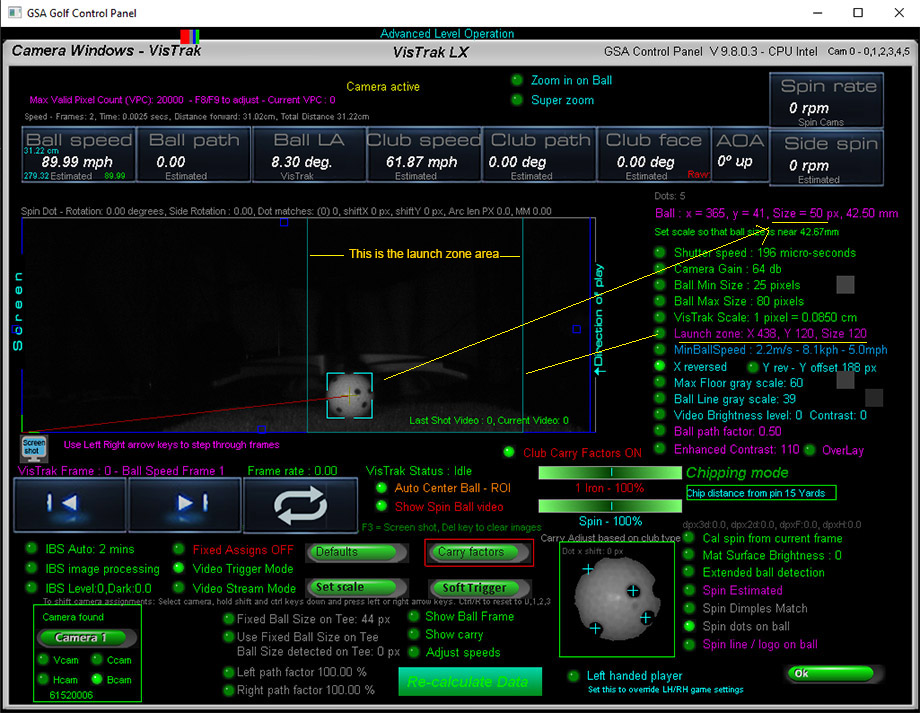
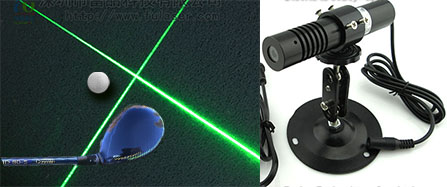
EVi Vcam vertical launch angle detection without side illumination
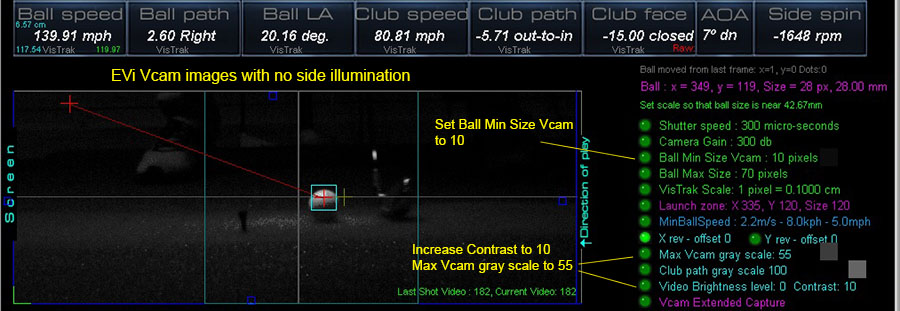
The floor mounted Vcam camera was around 7ft away using a 6mm lens
![]()
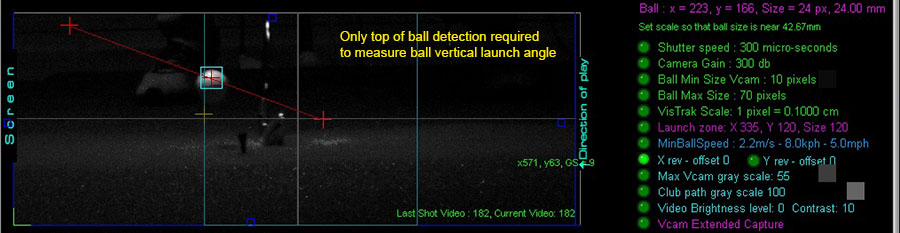
EVi Vcam close to launch position

The Vcam can also be placed close (12 to 15 inches) to the ball launch position.
In this case, ball spin can be measured.

![]()
Laser setup
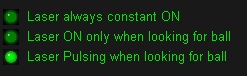
Place ball on the usual position on the hitting mat.
Switch to "Laser always constant ON" in the CP's Setup panel.
Manually aim laser to point at the ball.
Switch back to "Laser ON or Pulsing when looking for ball"
![]()
Technical Support


Email and remote access support is available for all original purchasers of GSA Golf systems.
E-mail support is free of charge for all original purchasers of GSA Golf systems.
Remote access support is available for all purchasers for $49 per session (max 1 hr per session)
First 2 sessions are free of charge
Note that your 1 hour session can be divided up to 2 sessions of 30 min or 4 15min sessions
Remote support sessions are available 7 days a week (including weekends i.e. Sat or Sun) at 2pm ET
Remote access support requires that you have "TeamViewer" installed on your PC
Go to www.teamviewer.com to get your free team viewer installed
Buy GSA Golf remote support 1 hr session for
![]()
![]()

![]()

 Home
Home Sensors
 Cameras
 Software
 Enclosures
 GSA Courses
 E6 Courses
 Business
 Tech News