![]()

Initial Setup after unpacking
 -
-
VisTrak LX Installation
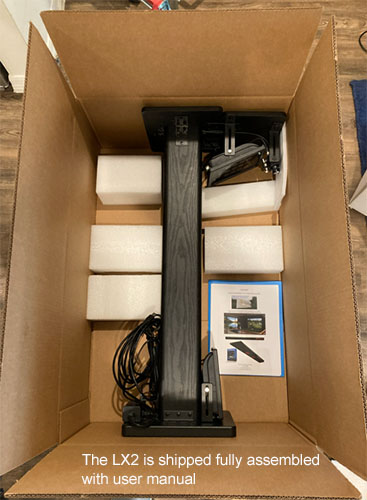

Unpacking
The LX2 is shipped full assembled with a user manual.
Note that the unit is quite heavy (22 lbs)
so be careful when removing the packing material so that it is not dropped.
Installation Steps
Step 1.
Download and install the Control Panel software from the link sent to you

If not already installed, download from the Tech News page.
Step 2.
Install the camera driver software from the supplied USB drive

Click the above button for detailed camera installation instructions
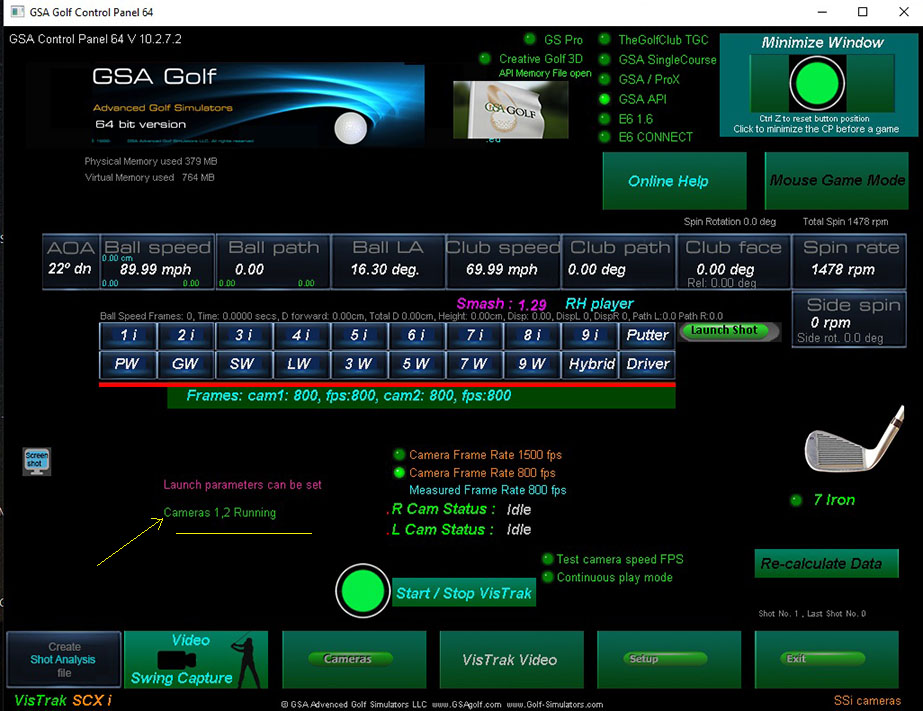
The CP main window
Depending on what system you have, you should see either 1 or 2 cameras are running
Step 3.
Connect the cameras to USB3 ports via the USB cables on your PC
and plug the unit into a power outlet via the 15ft power cable
Switch the unit ON
Step 4.
Start the Control Panel and ensure that both cameras are running
(i.e. there's no error messages and you see the message that 2 cameras are running)
Step 5.
Go to the Setup panel and select Vistrak LX2 from the list of systems on the right hand side of the Setup screen
Step 6.
Go to the camera 1 (the Hcam ) panel and right click on the "Defaults" button to set all settings to their default values.
Step 7.
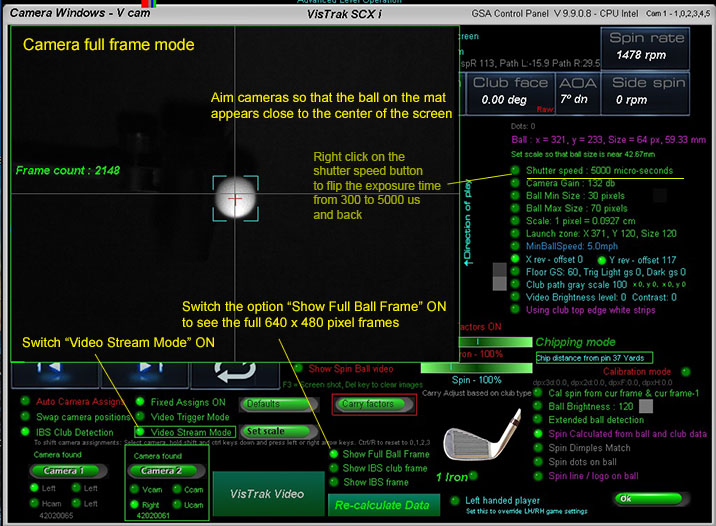
With a ball placed on its normal launch position on your mat,
select the "Show Full Ball Frame" option and the "Video Stream Mode" option and aim the camera so that it appears close to the center of the screen
Step 8.
Do the same for camera 2 - The Vcam .
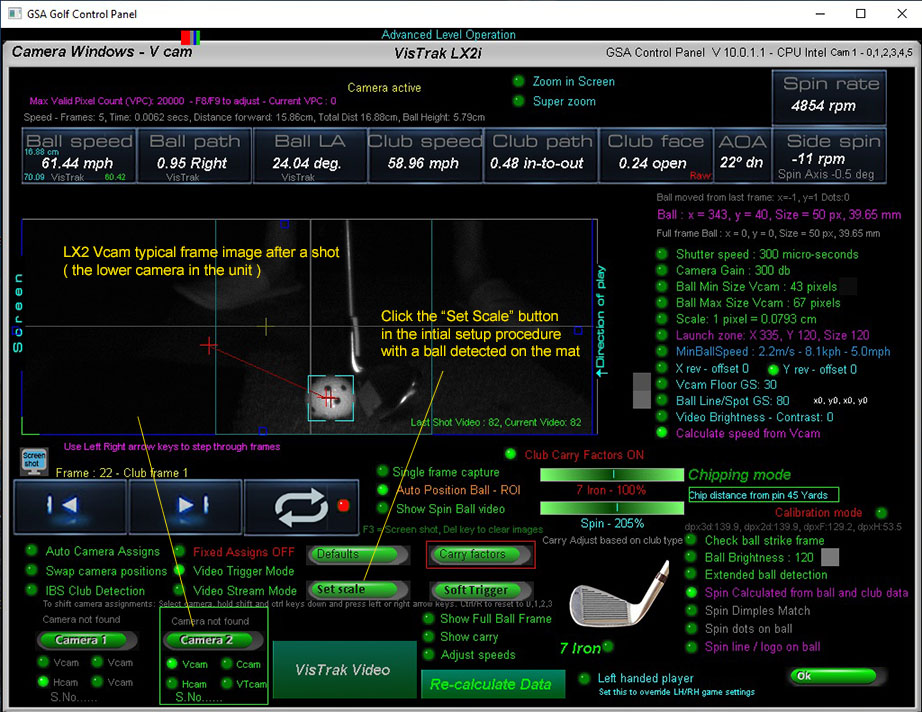
Step 9.
Go to camera 2 in the camera panel and switch OFF "Show Full Ball Fame"
Click on the "Soft Trigger" button to grab a new image of the ball on the mat and click the "Set Scale" button.
Step 10.
Click on the Start Cameras button in the Control Panel's main window
(or click the large Minimize button at the top right side of the panel)
and wait a second or 2 until you see the message " ball detected, ready for swing"

Step 11.
You are now ready to play the ball
after a ball strike, you should see the message "Ball launch detected. Launch parameters sent to the game software"
Step 12.
Start you golf game software (E6, GSpro, TGC, CG3d or GSA Golf) and click the large minimize button at the top right of the screen .
You are now ready to play a round.
![]()

Steps 1 and 2
SSi camera driver installation
Click above button to read
![]()
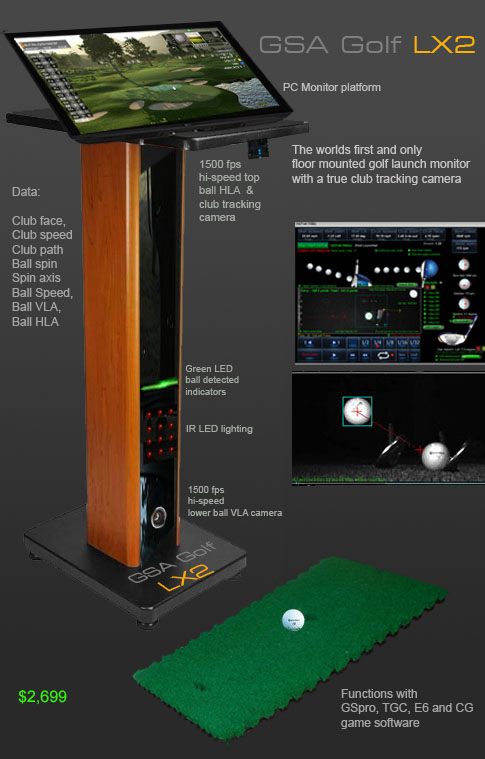
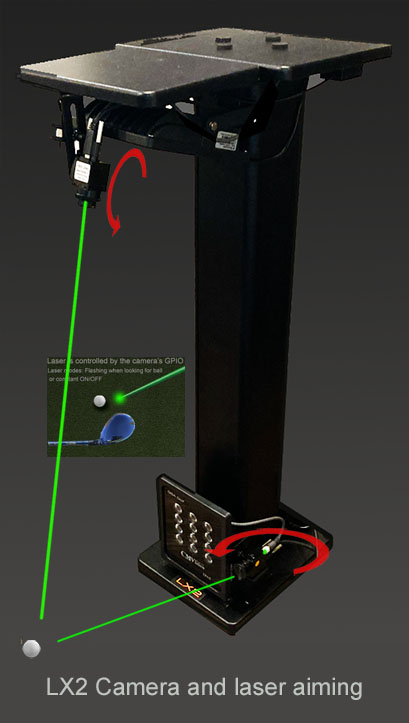
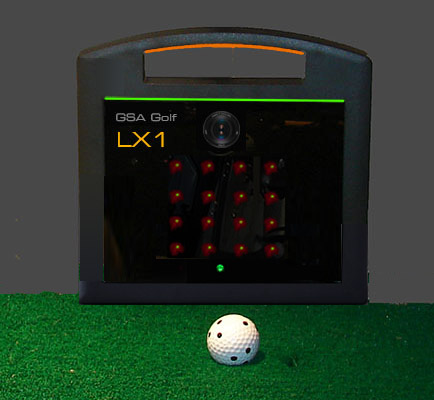
Step 3.
Unit and Ball placement
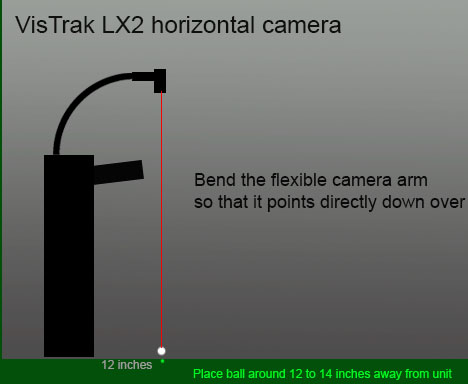
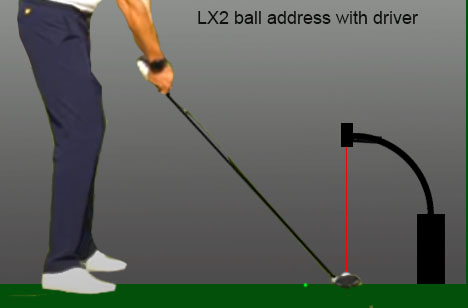
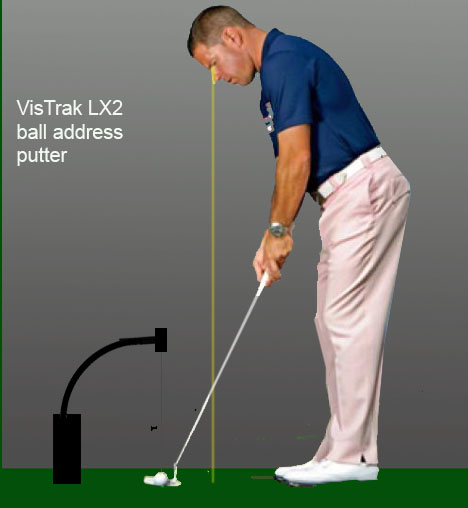
As can be seen from the above images, the LX2's top camera does not obstruct the view of the ball with any shots
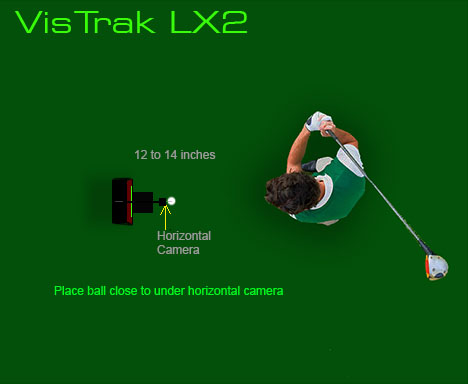
Place unit and ball as indicated (i.e. around 12 to 15 inches from the unit)
Go to Camera 2 in the camera panel
Click on the "Show Ball Frame" and click on the "Video Stream Mode" to start the camera.
Aim the horizontal camera on the flexible arm so that the ball appears close to the center of the image.
Aiming the laser
Switch the laser dot ON in the setup panel
Once the ball is detected in the Hcam, aim the laser to the spot where the ball is.
![]()
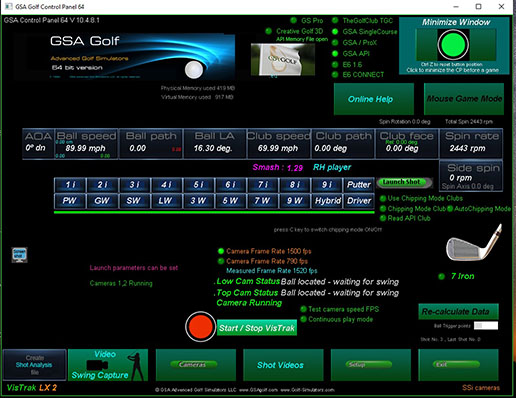
The CP's main window
Step 4.
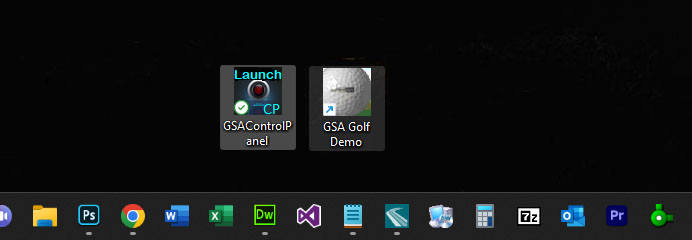
Click on the Launch CP to start the Control Panel
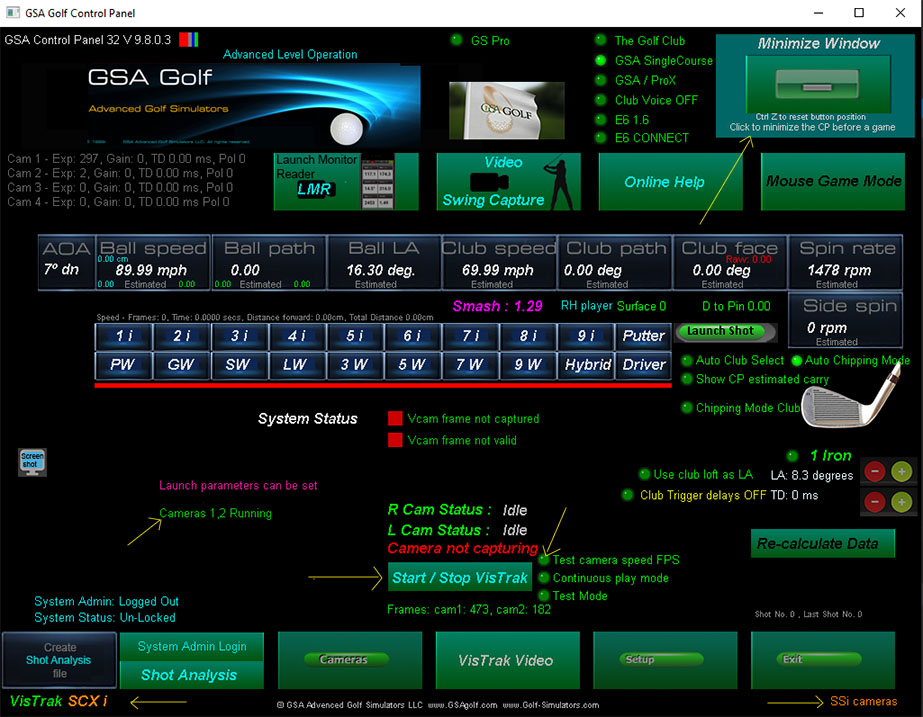
After the camera drivers are installed and you start the Control Panel (CP) with the cameras connected to the PC
you should see that cameras 1 and 2 are running.
![]()
The CP's setup panel
Step 5.
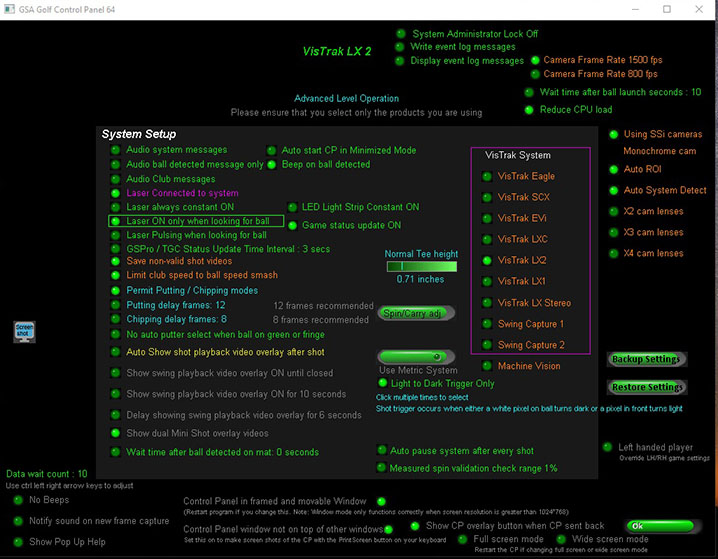
Go to the Setup panel and select Vistrak LX2
Ensure the option " Using SSi cameras" is selected ON
![]()
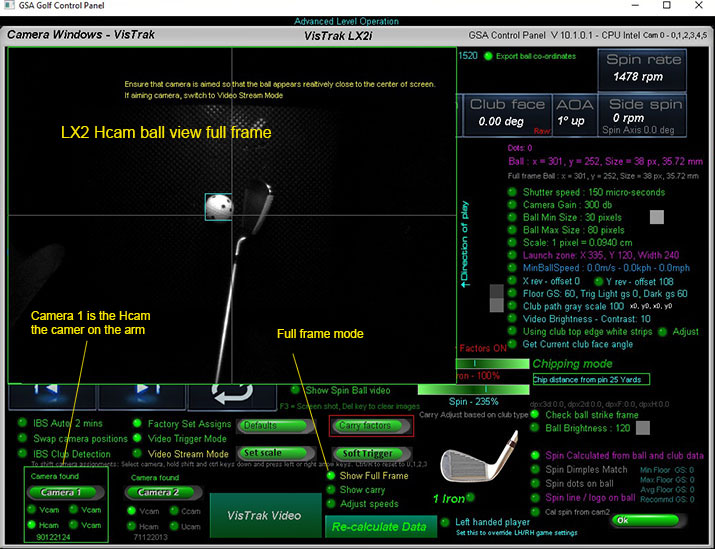
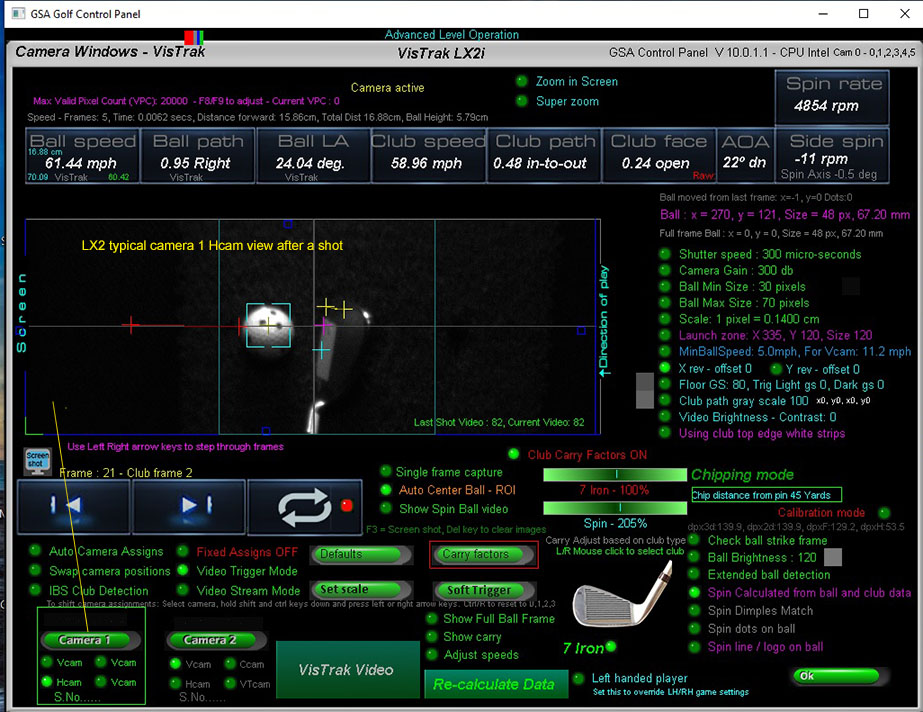
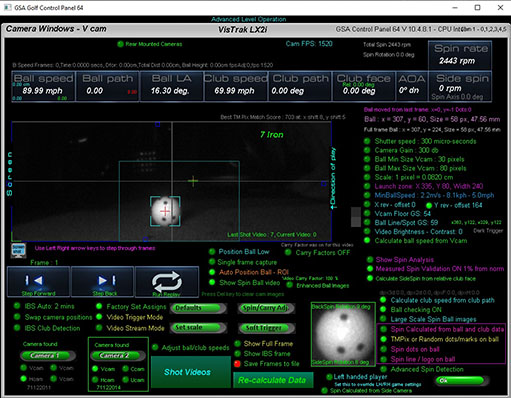
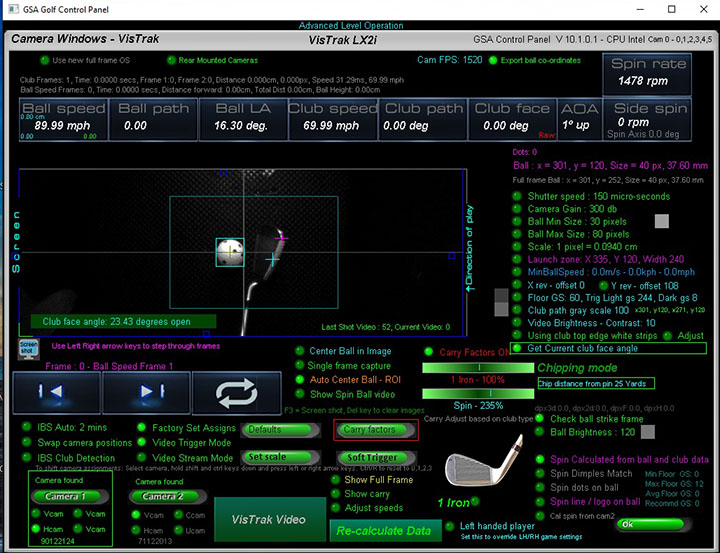
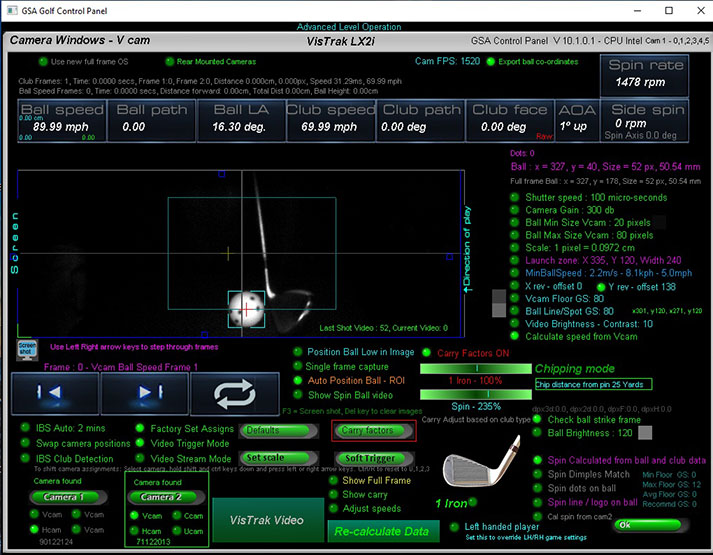
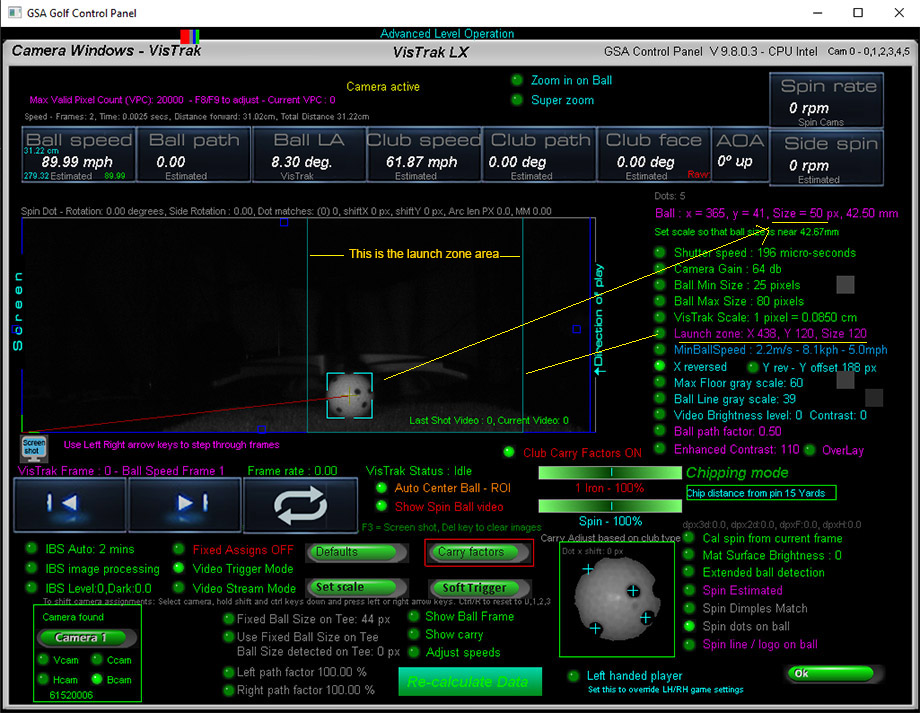
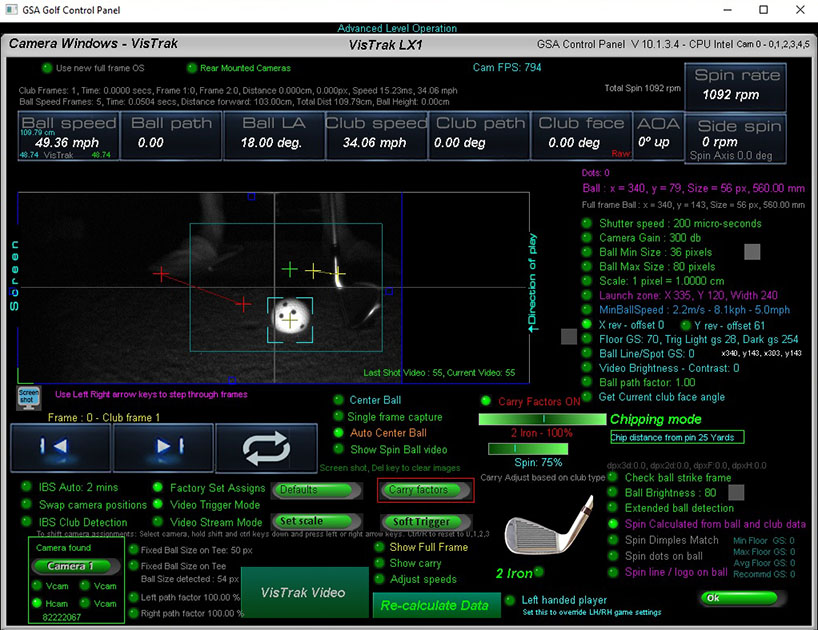
The CP's camera windows
Step 6
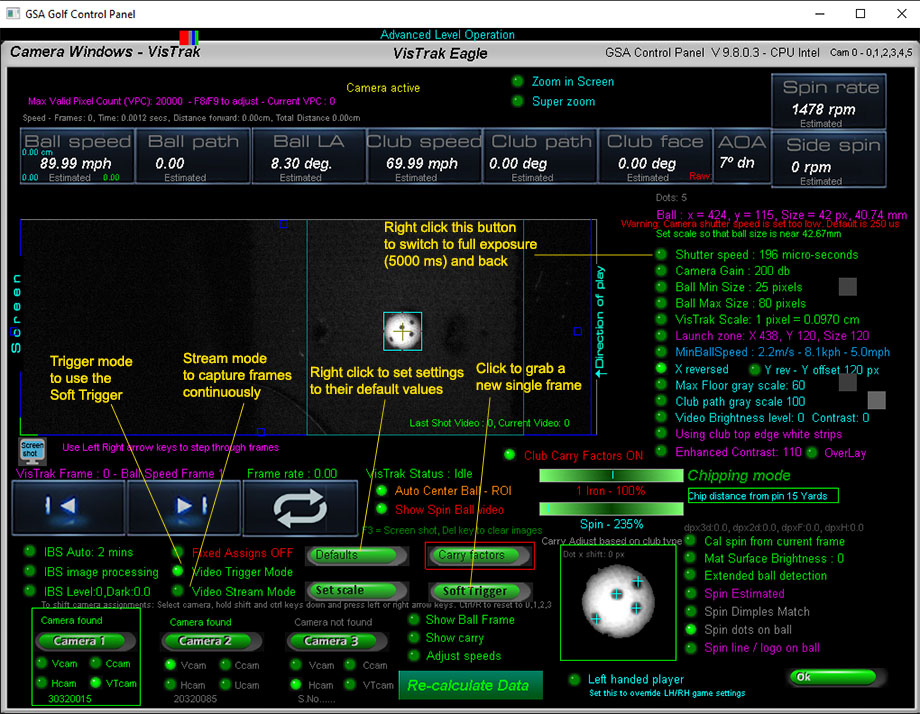
Right click on the "Defaults" button in both cameras 1 and 2 to set all settings to their default values.
![]()
Step 7 and 8.
Checking the camera aiming
With the "Show Full Ball Frame" and "Video Stream Mode" options switch on in the camera window,
ensure that the ball in both cameras appears approximately in the center of the images as shown above.
It doesn't have to be exact as the cameras will position the ball automatically.
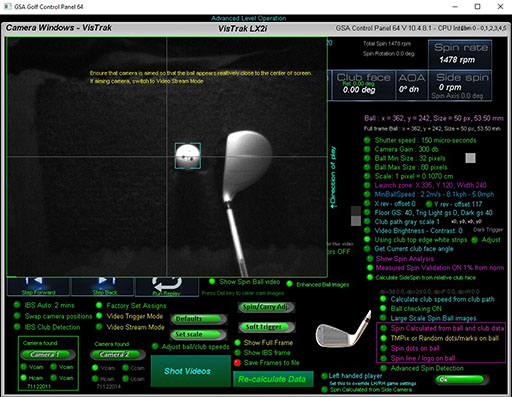
Camera 1 : The top camera.
with the system in Video Stream mode and the Show Full Frame option is set ON,
aim camera so that the ball appears close to the center of the frame image.
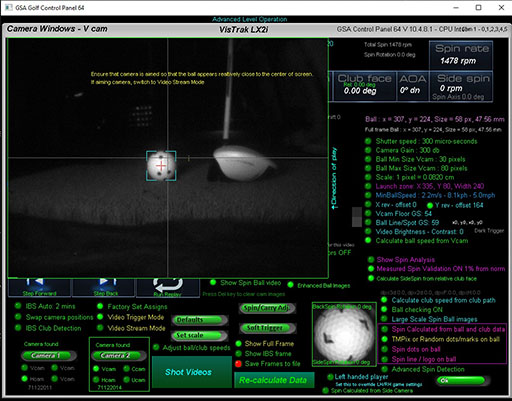
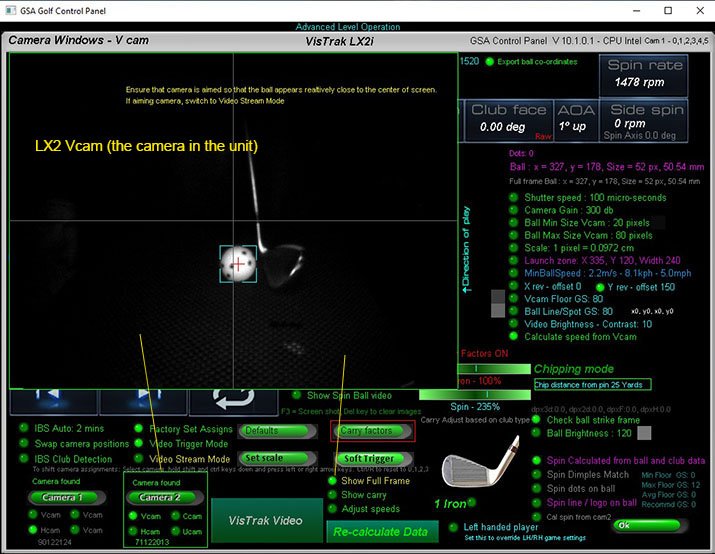
Camera 2 : The lower camera.
With the system in Video Stream mode and the Show Full Frame option is set ON,
aim camera so that the ball appears close to the center of the frame image.
Go back to the CP's main panel and click the "Start/Stop Vistrak" button
You should see that the ball is located in both the top and bottom camera and the system is waiting for a swing.
Then go back to the Camera panel and check that the ball is centered in camera 1
Then switch to camera 2 ( the bottom camera) and check that the ball is shown in the lower center segment of the frame image
![]()
Step 9.
Click on the Start Cameras button in the Control Panel's main window
and wait a second or 2 until you see the message " ball detected, ready for swing" and/or hear the ball detected beep sound

The CP's status messages.
After clicking the Start / Stop VisTrak button or clicking the Minimize button,
the CP will start looking for a ball in the Launch Zone area.
When a ball is detected, a beep will sound.
If a valid shot has been detected, the system will send the shot data to the game software.
After the ball has landed, the CP will automatically cycle back to the Looking for Ball mode
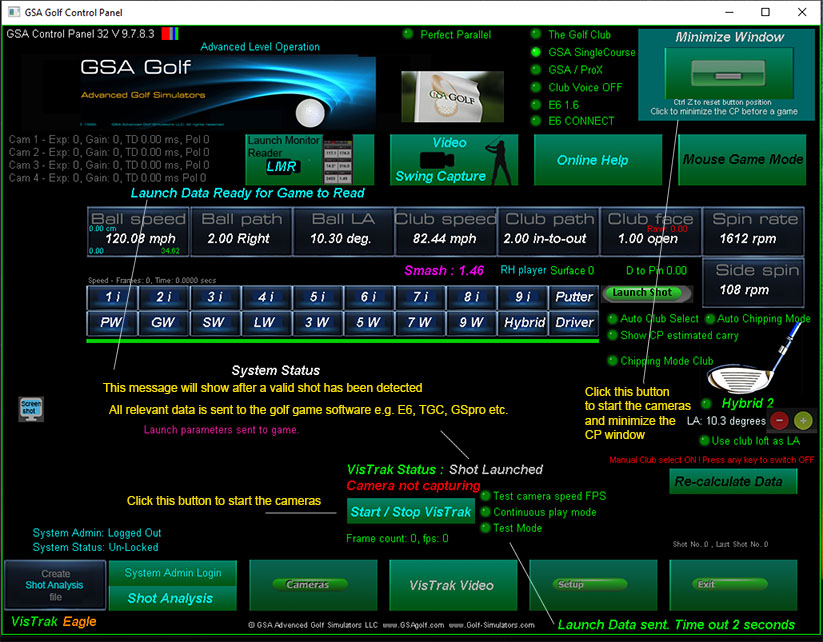
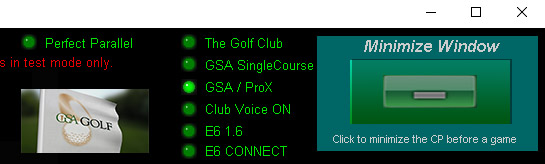
After Clicking the large "Minimize Window" button in the CP,
2 small buttons will show at the top left hand side of the game software.
Click on the minimized Control Panel to go back the full size CP window
Click Show Swing Video to see the last shot video
You are now ready to play the ball
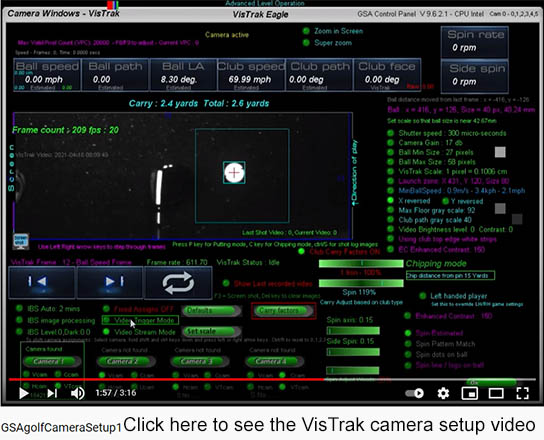
![]()
VisTrak Camera installation Video
![]()
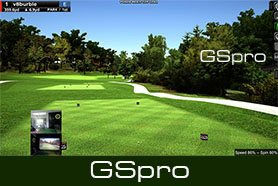
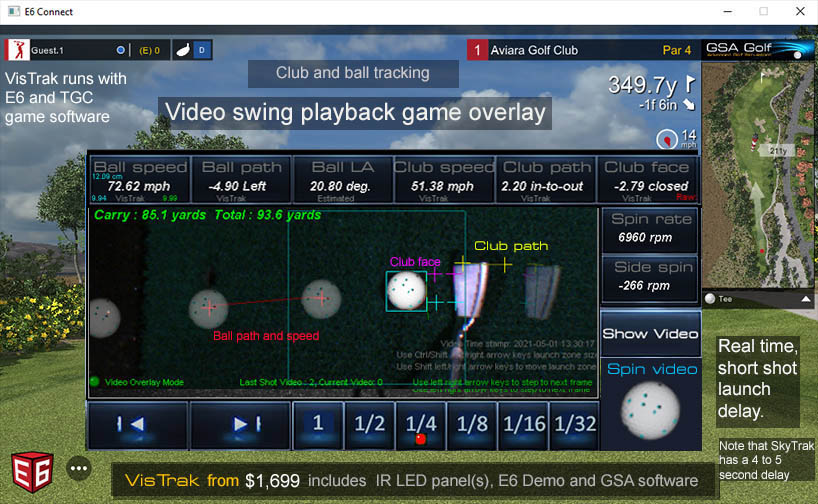
VisTrak Golf Game Play
VisTrak interfaces with TGC (The Golf Club), GSA ProX, GS Pro, RedChain, E6 1.6 and E6 Connect golf game software.
Select the game software you are using from the radio buttons at top right corner of the Control Panel's main window.
Click the large "Minimize Window" button to start the cameras and connect to the game.
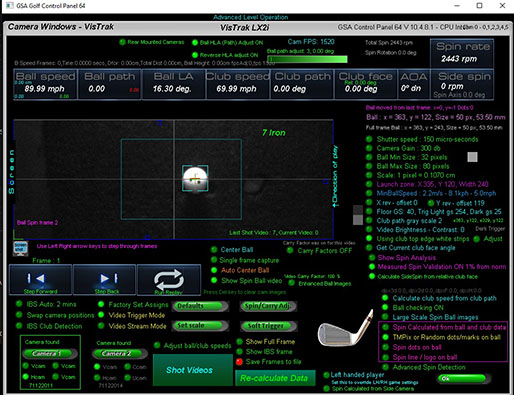
![]()
![]()
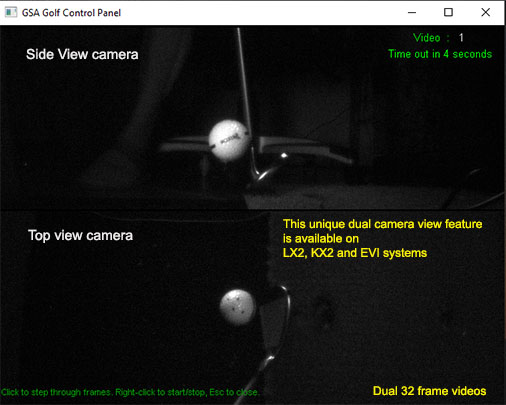
The CP Shot Replay Video panel
The KX features dual swing playback videos after every shot
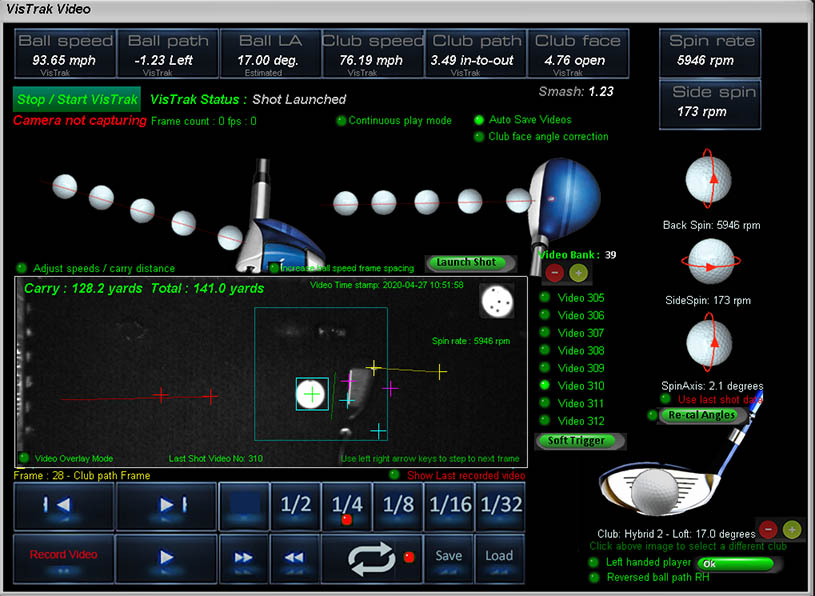

The video shot video panel allows you to replay any recorded shot video.
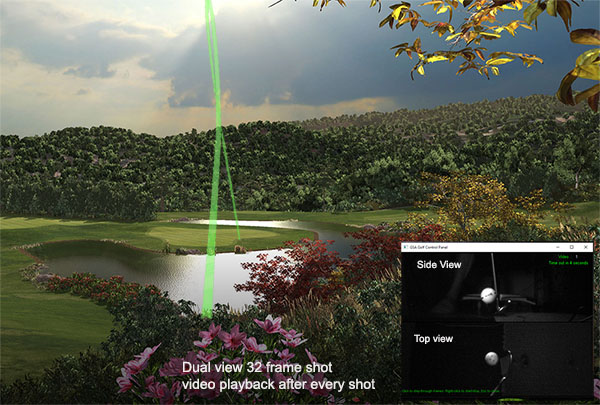
The new "Mini" shot videos are immediately displayed in the game software after every shot.
The video window can be positioned anywhere in the game software.
![]()
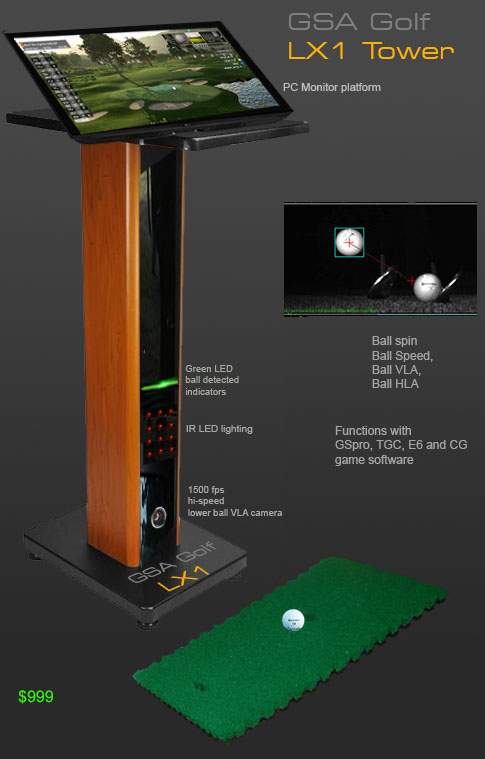
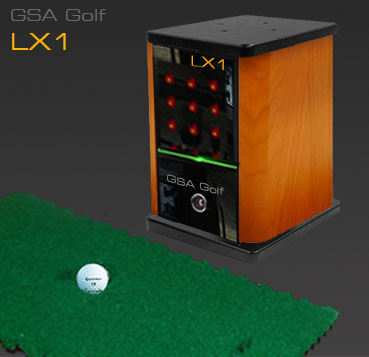
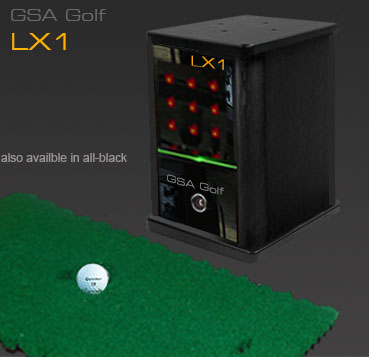
LX1 setup
 -
- -
-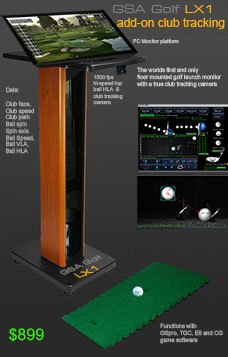
The LX1 setup is the same as the LX2 other than it is only using one camera
![]()
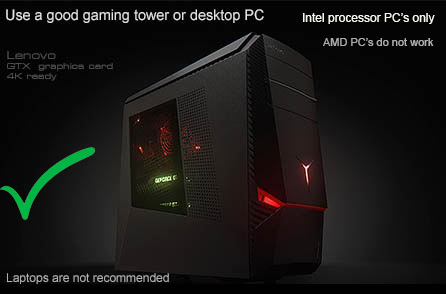
GSA Golf system minimum PC requirements
 -
-
Intel i5 or above Processor with a desktop gaming PC
Warning! Do not use PC's with AMD processors !
8GB RAM Nvidia 1070 Graphics Card or equivalent
25GB of Hard Drive Space
Windows 10 or 11 (Required)
Internet Connection
(Required if using 3rd party game software such as E6, TGC or GSPro)
USB3 port (Required)
Note: The cameras are USB3 cameras
and will only run at the correct speed when connected via USB3 cables directly to separate USB3 ports on the PC
Warning
If using 2 cameras, do not connect the cameras together with a Hub !
All cameras must be directly connected to separate USB3 ports on the PC
Use only the supplied powered USB3 extension cables
![]()

![]()

 Home
Home Sensors
 Cameras
 Software
 Enclosures
 GSA Courses
 E6 Courses
 Business
 Tech News